Upload and Connect your Marketplace Integration
Once your integration code is ready, the next step is to upload it to Secoda.
Last updated
Was this helpful?
Once your integration code is ready, the next step is to upload it to Secoda.
Last updated
Was this helpful?
Navigate to the Integrations Page: Click on the Connect Integration, and scroll down to find the Marketplace option.
Enter Integration Details: Fill in the submission form with the integration name, upload an integration icon, and provide a detailed description of your integration.
Script Upload: Next, upload your integration script. The script must be a python file.
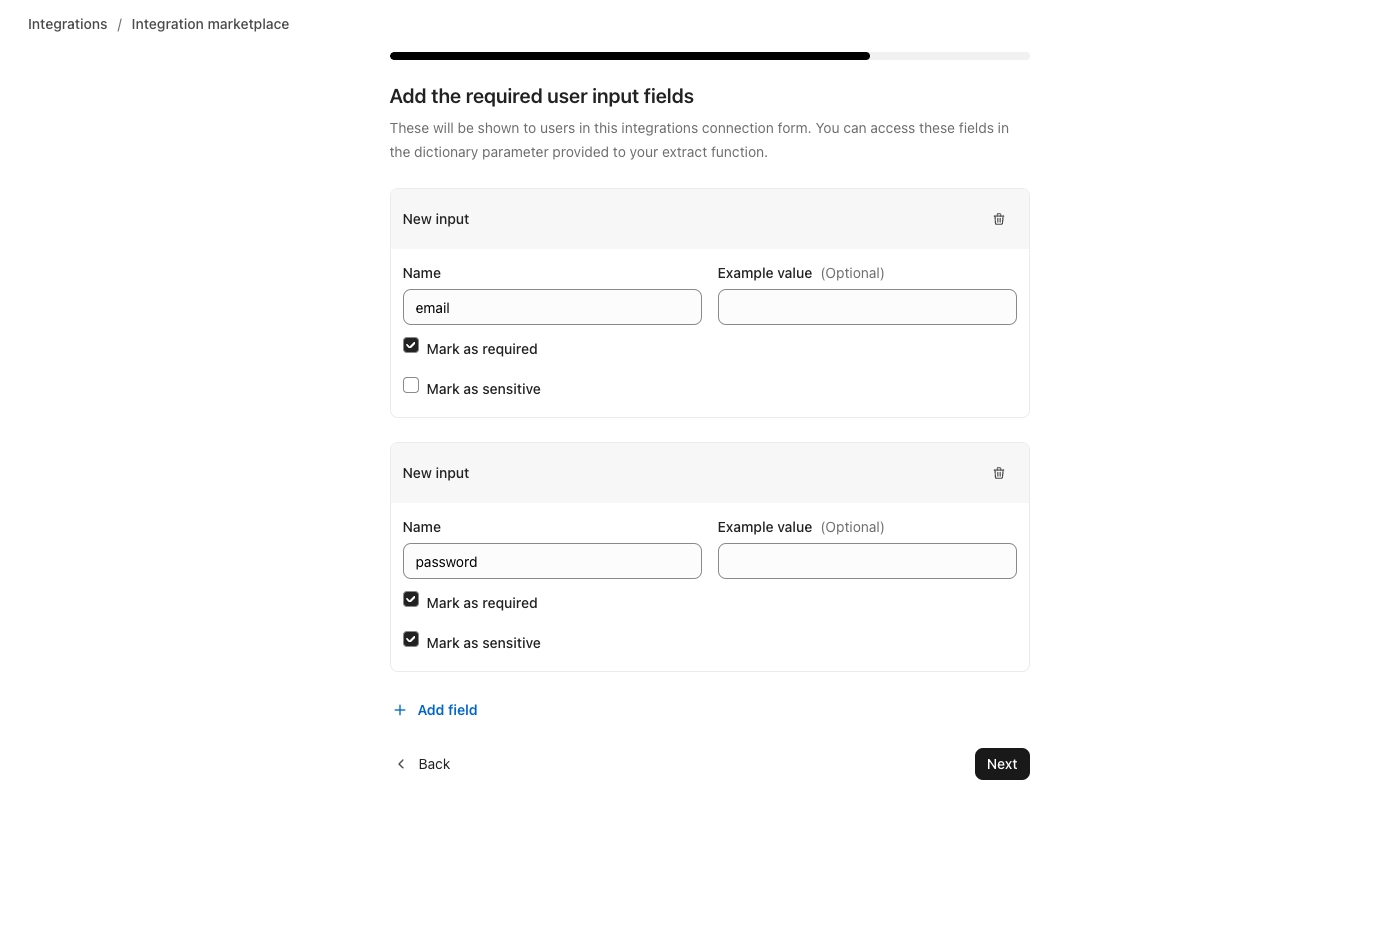
Configure User Inputs: List the user input fields that your script requires. In the example below, the fields for email and password are mandatory. password must also be flagged as sensitive to maintain the security of user credentials. The fields listed must directly match the code.
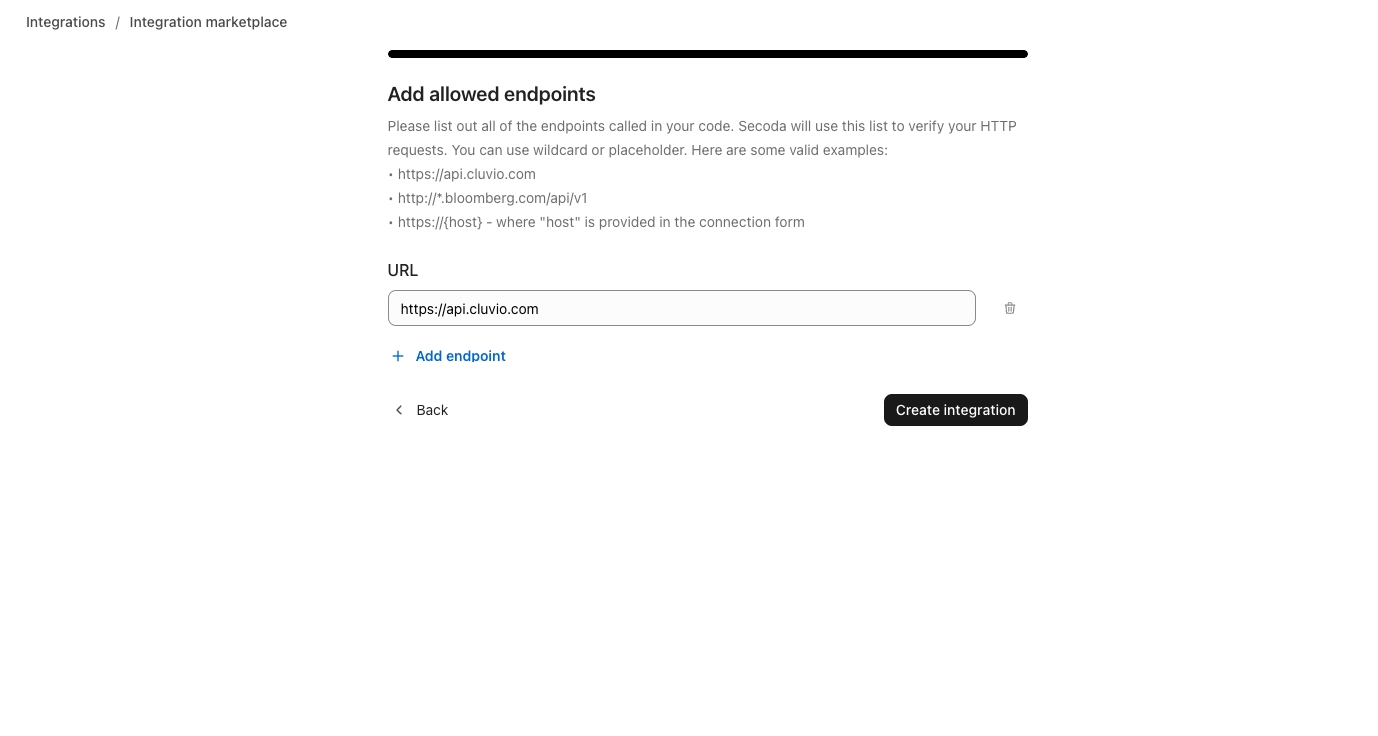
List Endpoint Permissions: Clearly list all the HTTP/HTTPS endpoints your script interacts with. This is a critical step that allows Secoda to validate the endpoints and allow the outbound traffic safely. This step ensures secure and seamless operation of your integration.
Once your custom integration has been uploaded, you can connect to it like you would any integration. It will now be available to select in the list of Integrations under the category indicated in the set up flow. It will have a Community tag indicating it was made by a Secoda user, and a Draft tag indicating that the integration is only available to the workspace that created it.
We encourage everyone to Publish their Marketplace Integrations so that any Secoda user can benefit from it.
To edit or create a new version of your Marketplace Integration, navigate to the Workspace Settings, and find all the custom Marketplace integrations created for your workspace under the tab Marketplace.