Google SAML
Steps
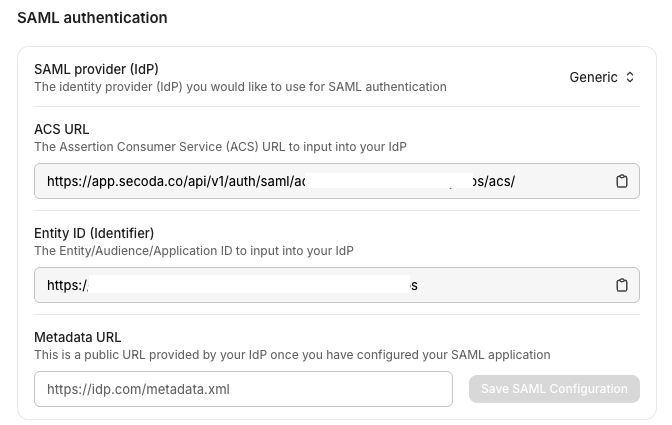
Go to the Secoda app > Settings > Security > SAML. Copy the ACS URL and Entity ID for use in the following steps.

In your Google Admin console (at admin.google.com)...
Go to Menu
Apps > Web and mobile apps.
Click Add App
Add custom SAML app.
On the App Details page:
Enter the name of the custom app.
(Optional) Upload an app icon. The app icon appears on the Web and mobile apps list, on the app settings page, and in the app launcher. If you don't upload an icon, an icon is created using the first two letters of the app name.
Click Continue.
Copy the SSO URL
Click Continue.
In the Service Provider Details window, enter the appropriate URL for these 2 fields with the details from Step 1.
ACS URL
Entity ID
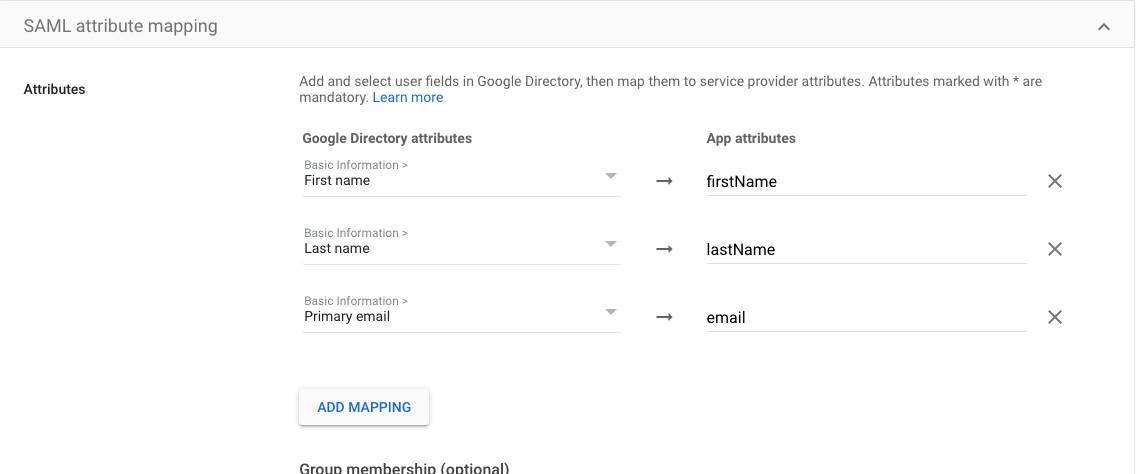
In the attributes, the following mappings must be set:

Navigate to the Secoda app > Settings > Security > SAML
Choose Google as the SAML Provider (IdP)
Paste the link from Step 7 under Metadata URL
Save this configuration.
You will now be able to go to navigate to Secoda, click “Sign in with SAML”, and enter your domain to complete sign-in.
Last updated
Was this helpful?