MongoDB
An overview of the MongoDB integration with Secoda
Getting started with MongoDB
There are 3 steps to get started using MongoDB with Secoda
Create a database user
Whitelist Secoda IP Address
Connect MongoDB to Secoda
Requirements
The MongoDB cluster must be running version 5.0 or above. Prior MongoDB versions do not support MongoDB's Stable API. You can read more about Stable API in the MongoDB documentation
Creating a database user
If you are using cloud MongoDB (Atlas), you may need to create a new database user to connect to Secoda. To do that, repeat the following steps.
Log into your Atlas account
On the sidebar go to
Security -> Database Accessand click onADD NEW DATABASE USERon the top right
Use the password authentication method and save both the user name and password. The role given to the database user can be
Only read any databaseunderbuilt-in rolebut it may need to be updated at a later date when Secoda comes out with new features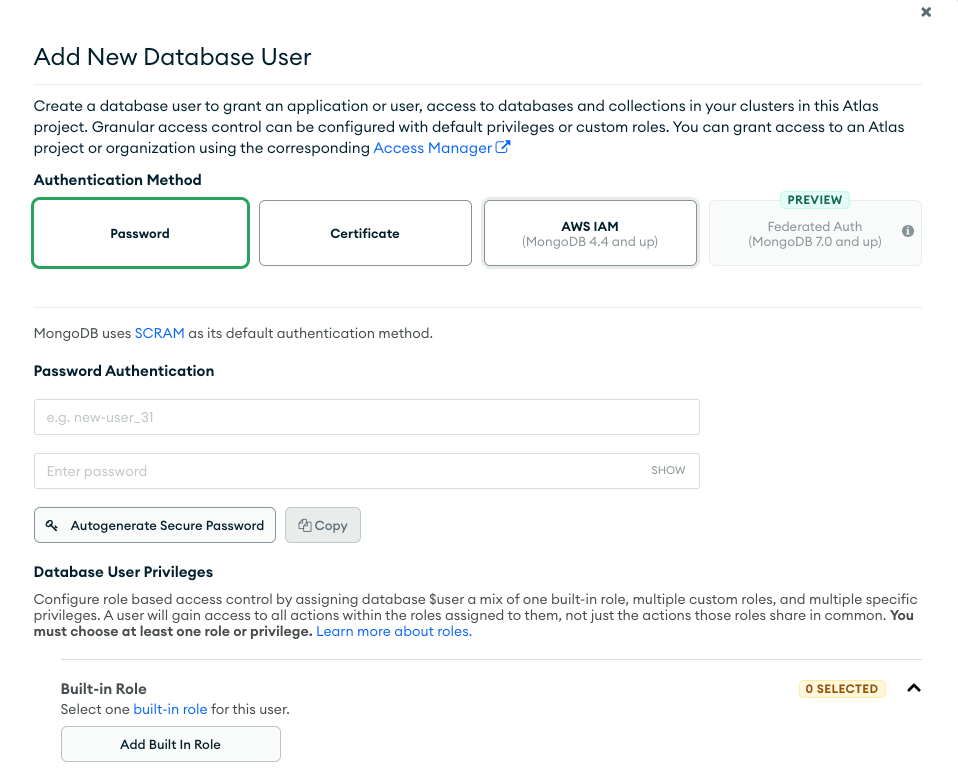
Whitelist Secoda IP Address
Once you have created the new database user, you need to add Secoda's IP address to the allowlist. To do that, repeat the following steps.
Log into your Atlas Account
On the side, navigate to
Security -> Network Accessand click onADD IP ADDRESSon the top right
Add the Secoda IP address.
Connect MongoDB to Secoda
To connect to MongoDB to Secoda, repeat the following steps.
In the Secoda App, select "Add Integration" on the Integrations tab
Click on
MongoDBEnter the URI, cluster name, and the team the integration will be associated with
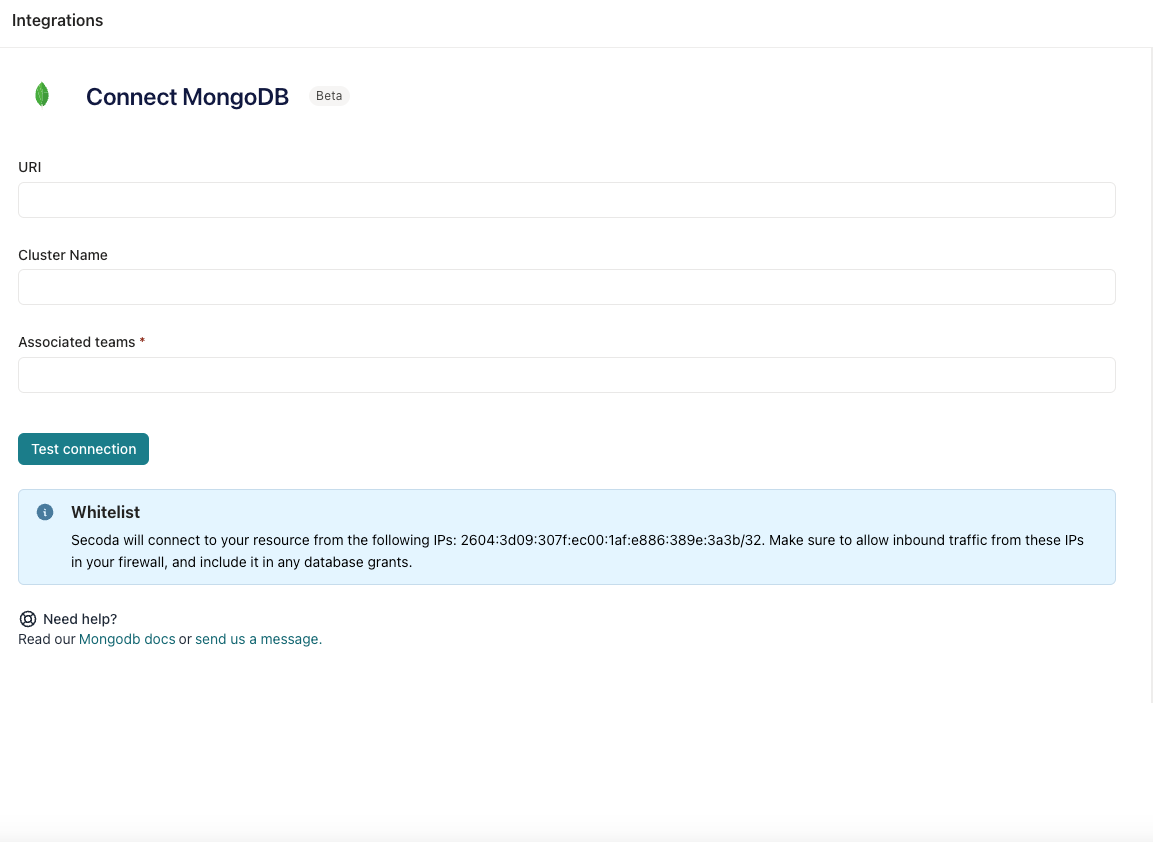
The URI can be found by navigating to
Deployment -> Databaseon Atlas and clicking on the cluster you are trying to connect to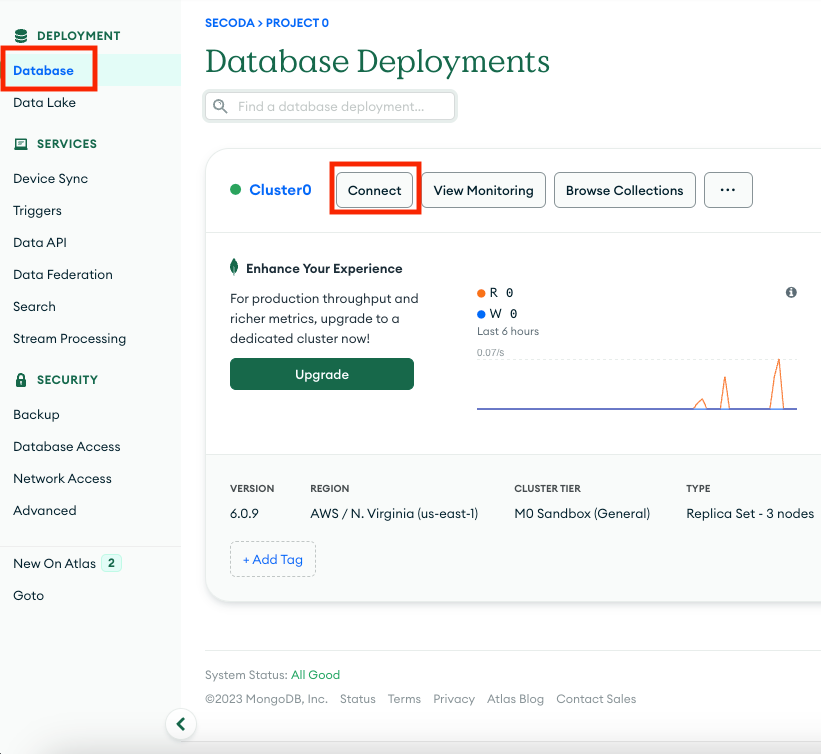
Click on
Driverto see a sample URI of the cluster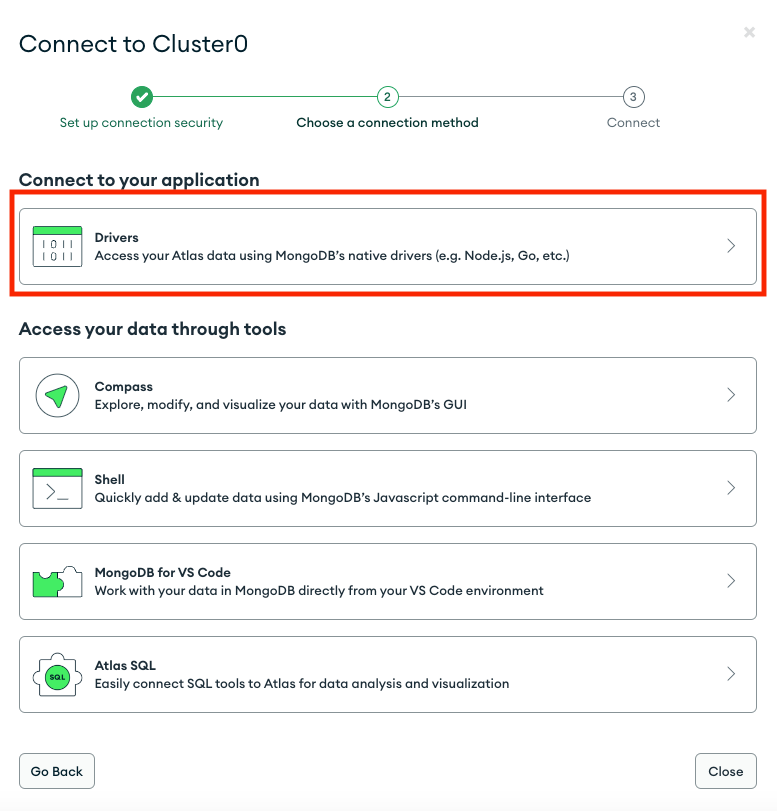
Copy and paste the
connection stringto the URI field, replacing<username>and<password>with the username and password that was used to create the database user in step 1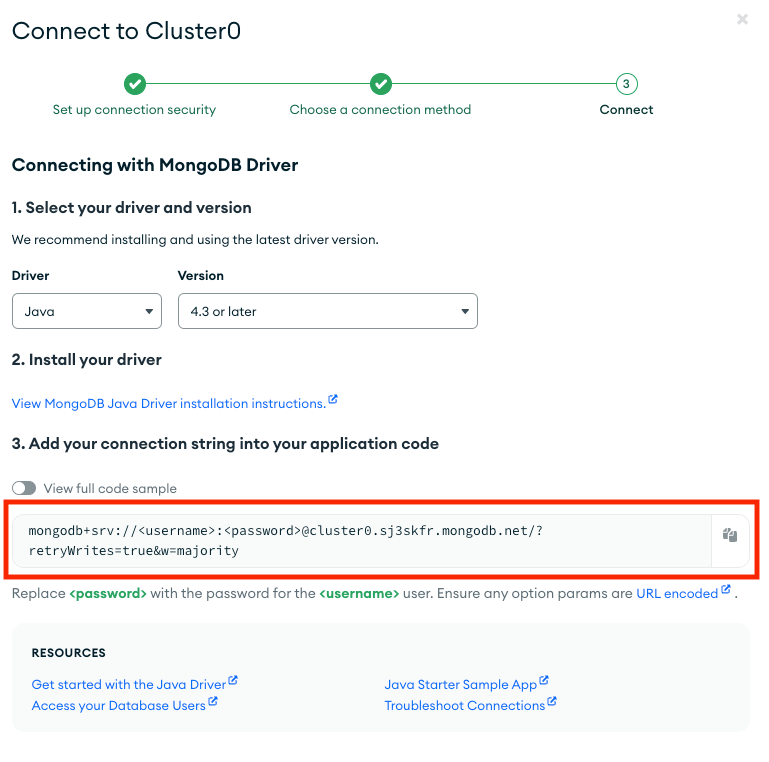
Once successfully connected, choose the databases and collections you want to extract to Secoda
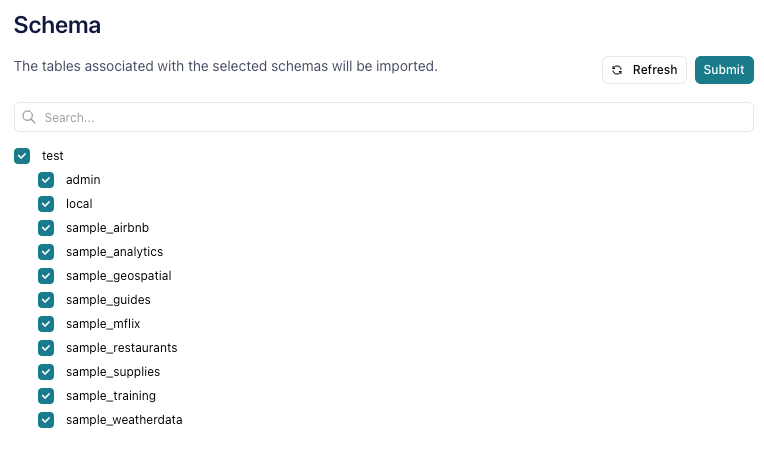
Run the initial extraction
Last updated
Was this helpful?