> For the complete documentation index, see [llms.txt](https://docs.secoda.co/llms.txt). Markdown versions of documentation pages are available by appending `.md` to page URLs; this page is available as [Markdown](https://docs.secoda.co/readme/secoda-as-an-admin/connect-your-data/hide-unwanted-datasets.md).
# Choose which schemas to extract
## How to hide schemas from Secoda
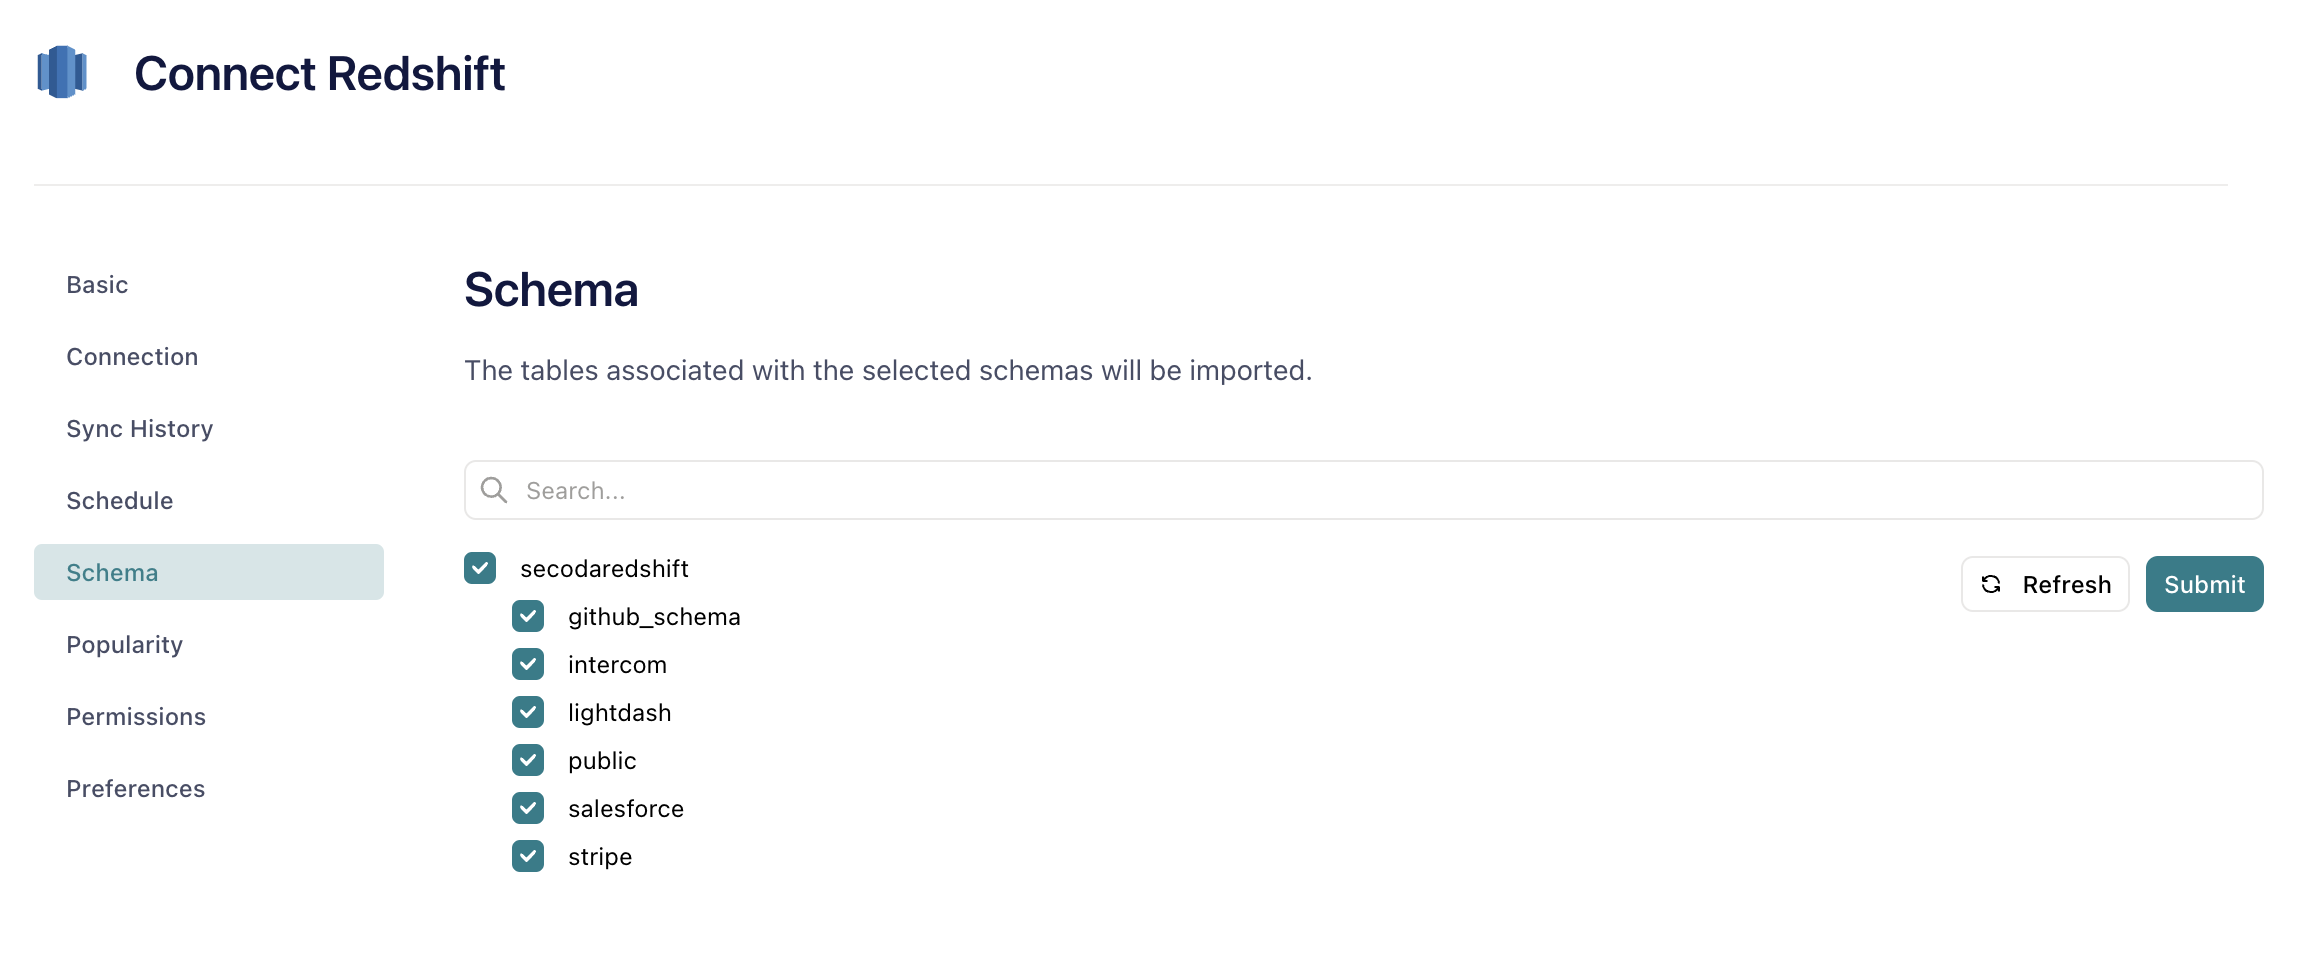
After connecting your data resources to Secoda, you can select which schemas, or groups, you'd like to see in Secoda. To do this, start by going to the **Integrations** page on the side bar.
From here, select the Integration and click on the **Schema** or **Groups** tab. Note: Schema is for databases and warehouses, while Groups is for data visualization tools.
On the **Schema/Group** page, you'll find all of the schema or groups that Secoda has pulled from your integration. Select the ones that you would like to be accessible on Secoda. The unchecked ones will not be extracted.
After you make any changes to your selections, you must click **Submit** to have the changes apply in your next extraction.
If you have new schemas or groups in the source that are not reflected in Secoda, you must click **Refresh** to have them brought in. Refresh will not impact your current selections, but will bring in any new schemas or groups as selected by default.
{% hint style="info" %}
Not using Secoda to manage your data documentation yet? Sign up for free [here](https://app.secoda.co/) 👈
{% endhint %}
---
# Agent Instructions
This documentation is published with GitBook. GitBook is the documentation platform designed so that both humans and AI agents can read, navigate, and reason over technical content effectively. Learn more at gitbook.com.
## Querying This Documentation
If you need additional information that is not directly available in this page, you can query the documentation dynamically by asking a question.
Perform an HTTP GET request on the current page URL with the `ask` query parameter, and the optional `goal` query parameter:
```
GET https://docs.secoda.co/readme/secoda-as-an-admin/connect-your-data/hide-unwanted-datasets.md?ask=&goal=
```
`ask` is the immediate question: it should be specific, self-contained, and written in natural language.
`goal` is optional and describes the broader end goal you are ultimately trying to accomplish on behalf of the user. GitBook uses it to tailor the answer towards what is most useful for that goal.
The response will contain a direct answer to the question and relevant excerpts and sources from the documentation.
Use this mechanism when the answer is not explicitly present in the current page, you need clarification or additional context, or you want to retrieve related documentation sections.