Import and export resources
Edit the properties or bring in new resources through this feature.
Overview
This guide provides a step-by-step process for exporting and importing metadata using CSV files in Secoda. This allows for bulk editing and updating of metadata to ensure consistency and prevent duplication across your data resources.
If your goal is to introduce net new resources from an integration without connecting the integration in the app, you should utilize the Custom Integrations feature. If you are looking to edit existing resources, such as glossary terms, documents, etc., the following instructions will guide you through the process.
Video resource
Exporting resources from Secoda
To export resources from Secoda:
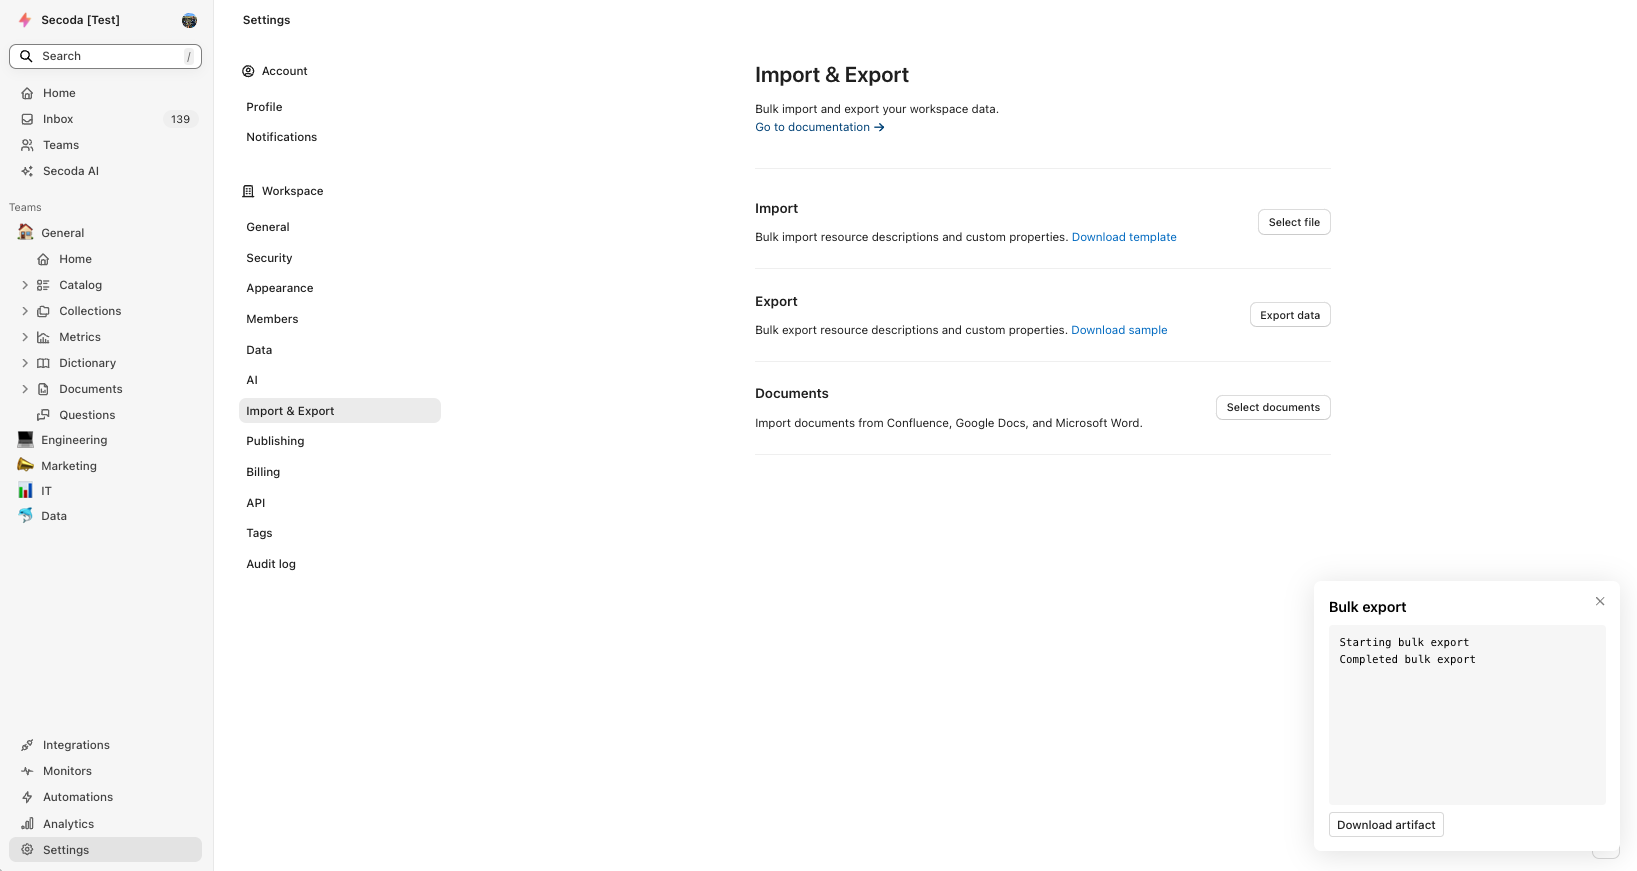
Navigate to settings: Go to Settings → Import & Export data.
Select resource type: Choose the type of resource you wish to export.
Download the export: Once the Artifact is prepared as a Bulk export of your resources, click the "Download Artifact" button.

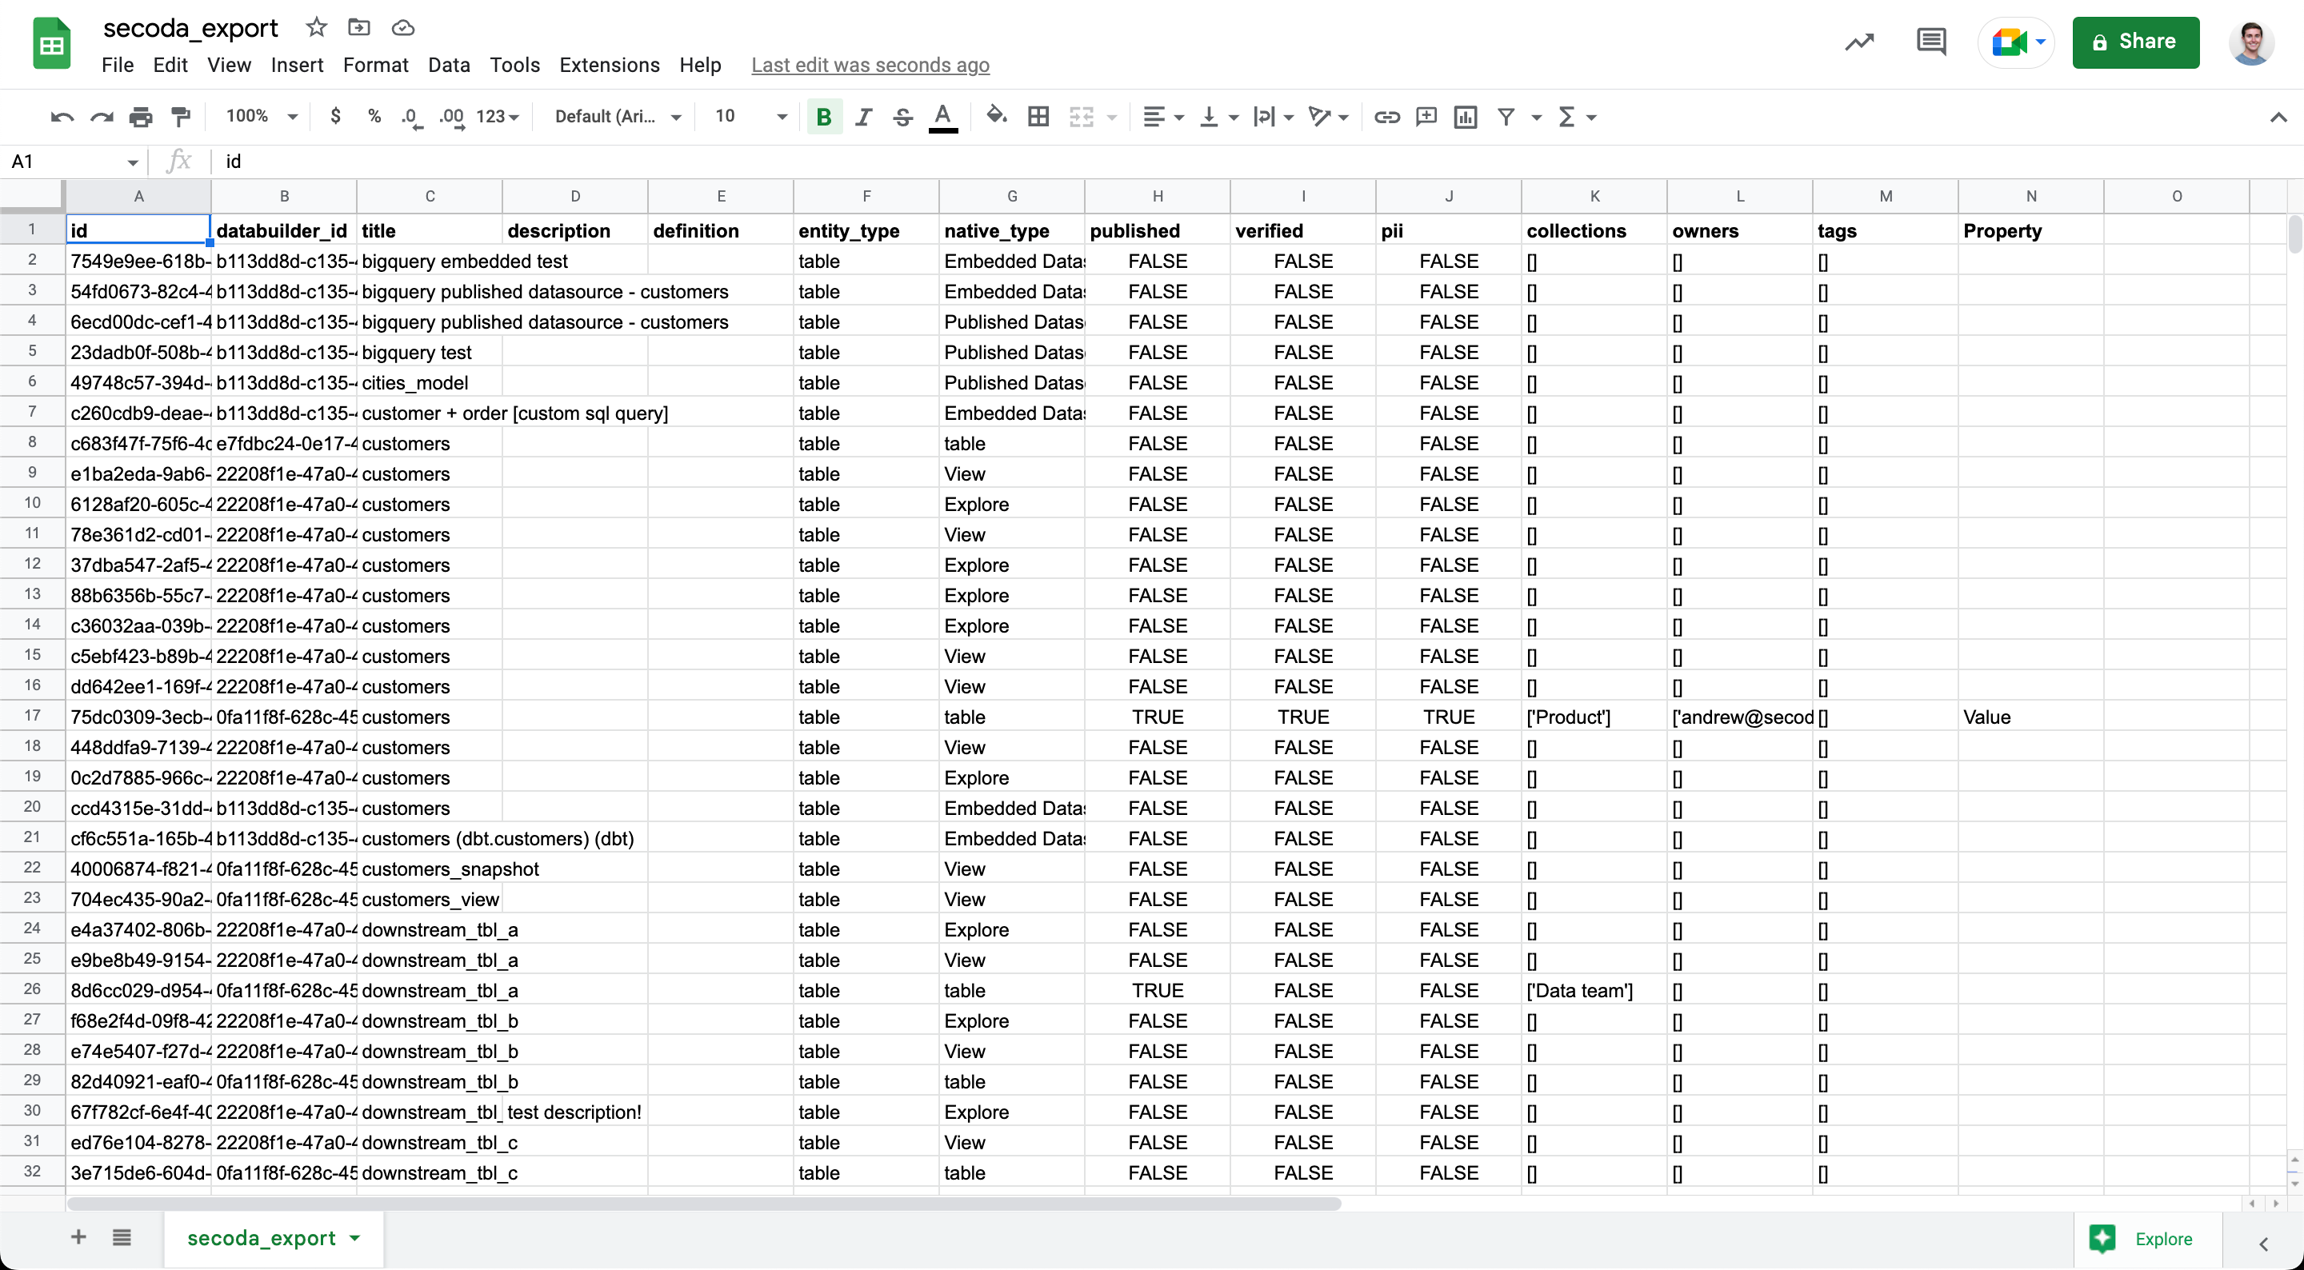
Below is an example of the results from exporting your data:

Preparing a CSV for import
Before importing new or updated metadata into Secoda:
Edit your CSV: After exporting, you can edit your descriptions and other properties in CSV format or Google Sheets.
Set up your CSV: Use the exported data as a base, the provided template in the UI, or create your own CSV adhering to the required structure:
Required columns:
id: Leave this blank for new resources.
title: The name of the resource.
entity_type: Possible values include table, column, dashboard, chart, job, glossary, document, collection, question, or event.
Optional columns:
description: A brief description of the resource.
definition: Markdown-friendly documentation of the resource.
pii: Governance tag (TRUE or FALSE).
verified: Verified status (TRUE or FALSE).
published: Published status (TRUE or FALSE).
collections: List of associated collection names, e.g., ['Marketing', 'Engineering'].
owners: List of associated owner emails that should correspond to existing users in Secoda, e.g., ['[email protected]'].
tags: List of associated tag names, e.g., ['production'].
tables: List of tables that need to be updated, e.g., [Team 1; Team2;]
Importing updated metadata into Secoda
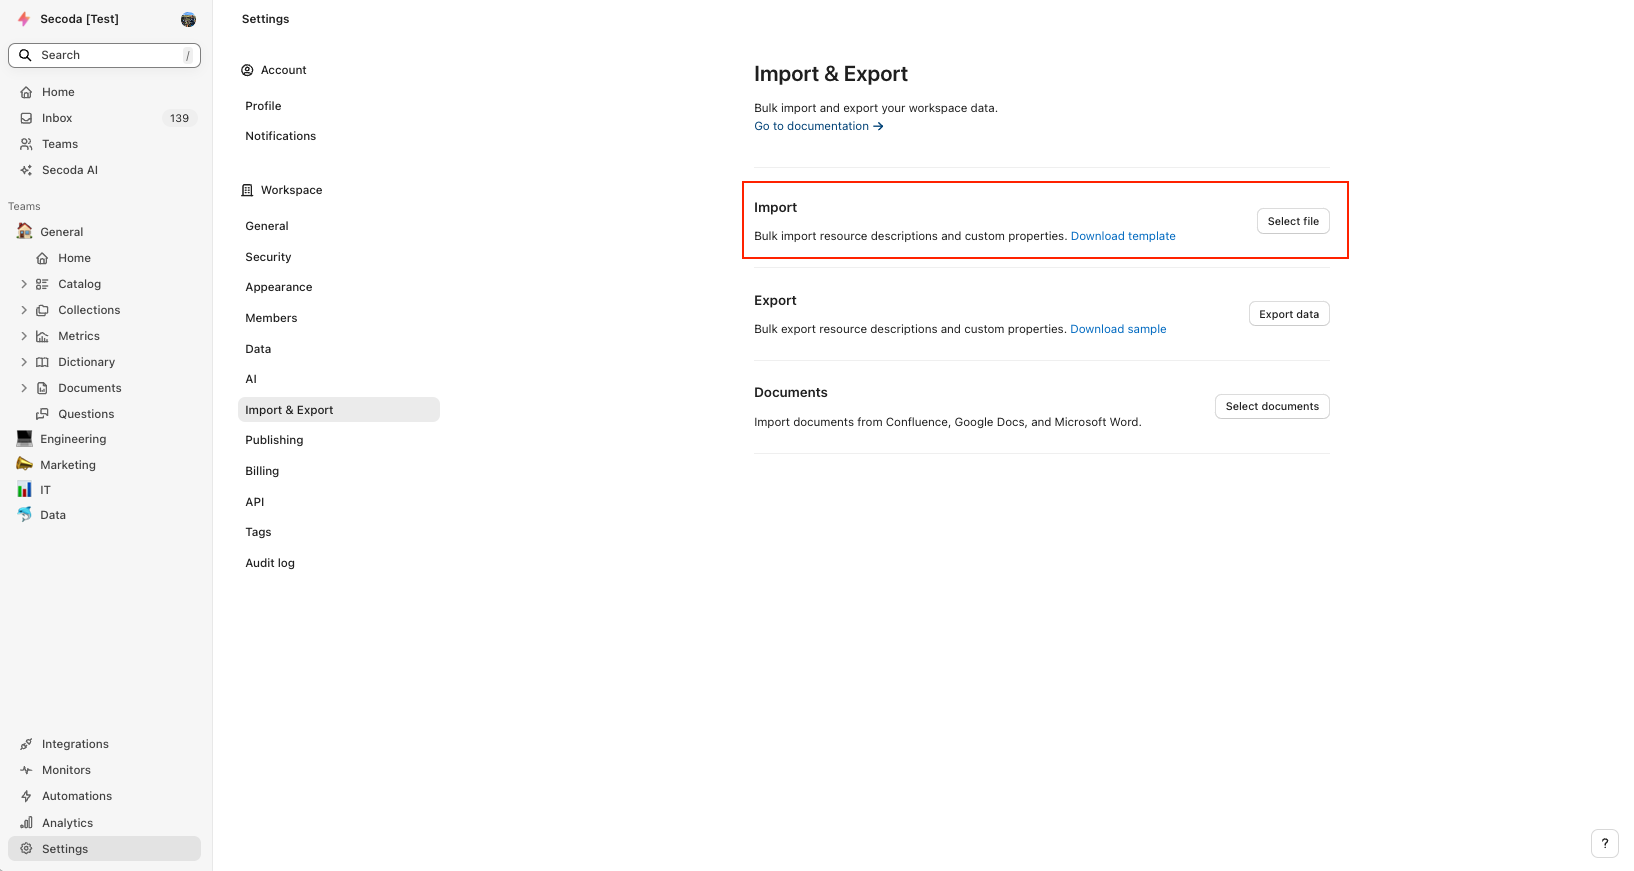
Access import settings: Log into Secoda, navigate to Settings > Import & Export.
Upload CSV file: Click "Select File" under the Import section, choose your prepared CSV file, and click "Upload". Monitor the import process through the displayed logs.

Verifying an import
After importing, it's crucial to verify that all properties have been correctly updated:
Check data resource: Visit a data resource within Secoda to confirm that the properties reflect the recent imports.
Resolve issues: If there are discrepancies or if you encounter issues, please contact [email protected].
By following these steps, you can efficiently manage the metadata of your resources in Secoda, ensuring data integrity and streamlined operations across your organization.
Not using Secoda to manage your data documentation yet? Sign up for free here 👈
Last updated
Was this helpful?