Connecting via AWS Cross Account Role
This page walks through Connecting an integration via an AWS Cross Account Role
Getting Started with AWS Cross Account Roles
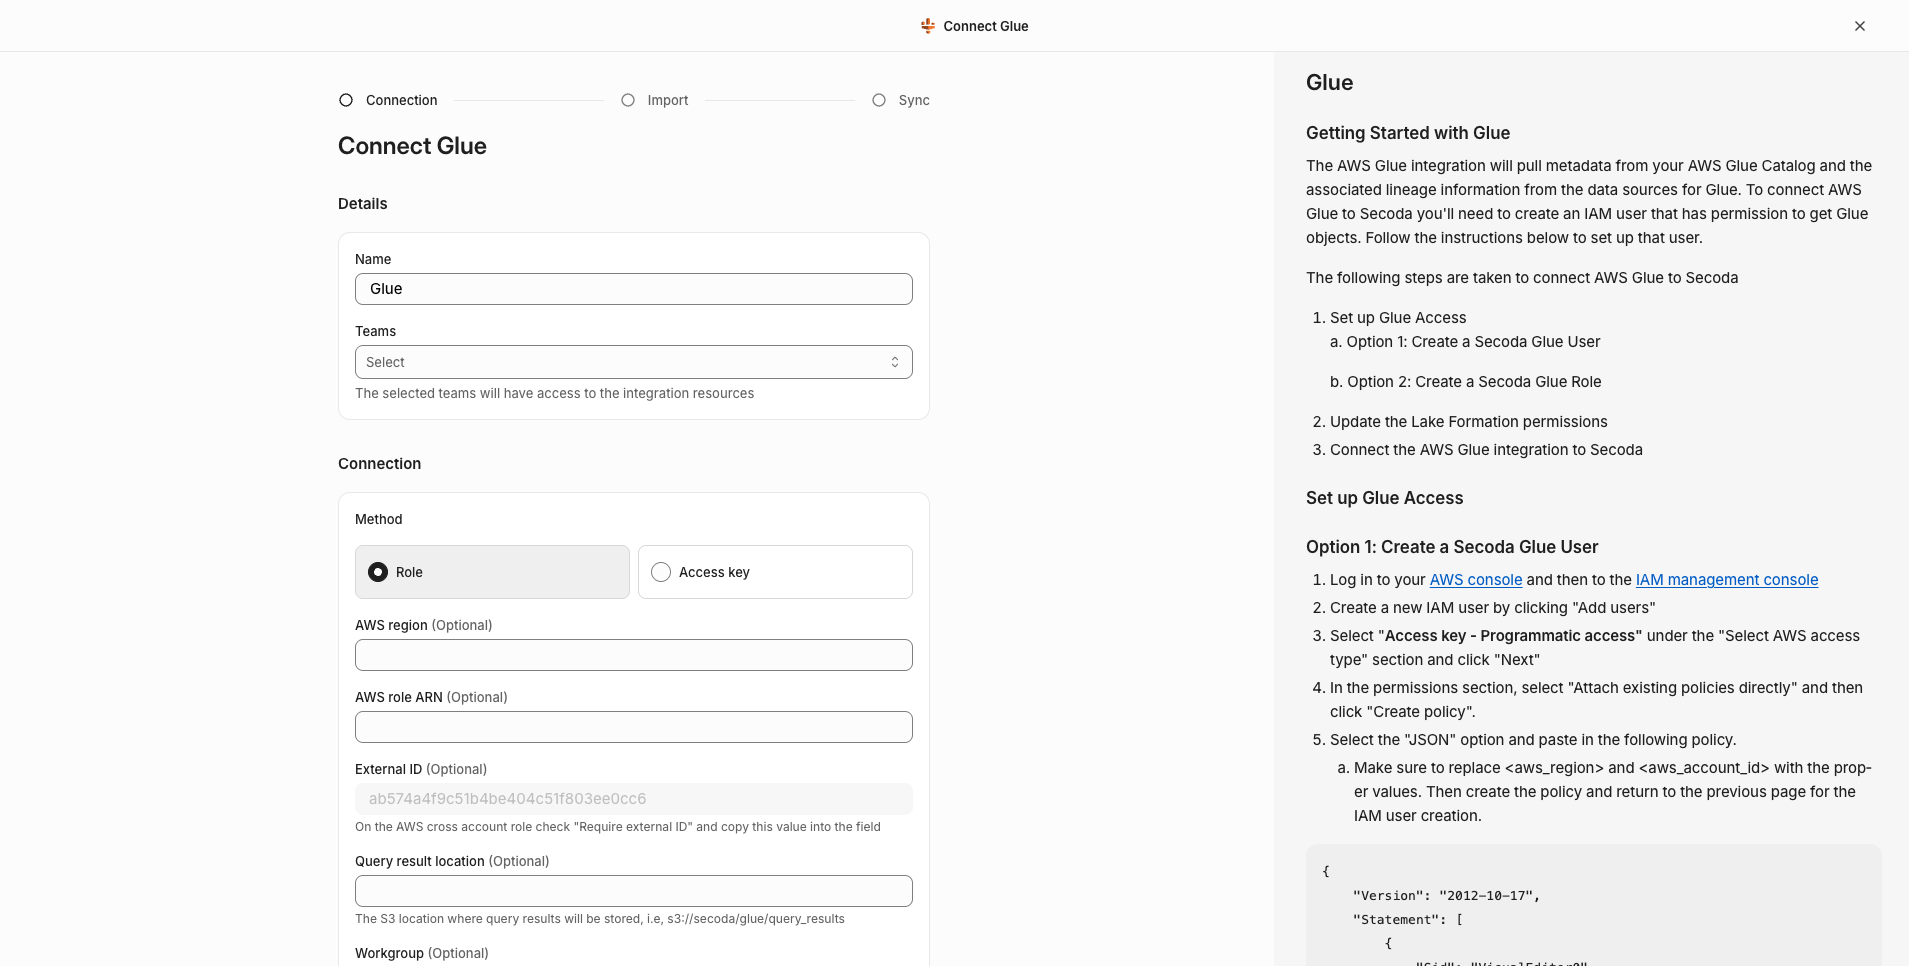
To start the process of connecting your AWS account to Secoda, navigate to the New Integrations page and select an AWS integration. Select the "Role" Option.

Cross-account roles are a mechanism provided by AWS to allow you to grant secure access to Secoda without requiring that you hand over sensitive secrets like Secret Access Keys.
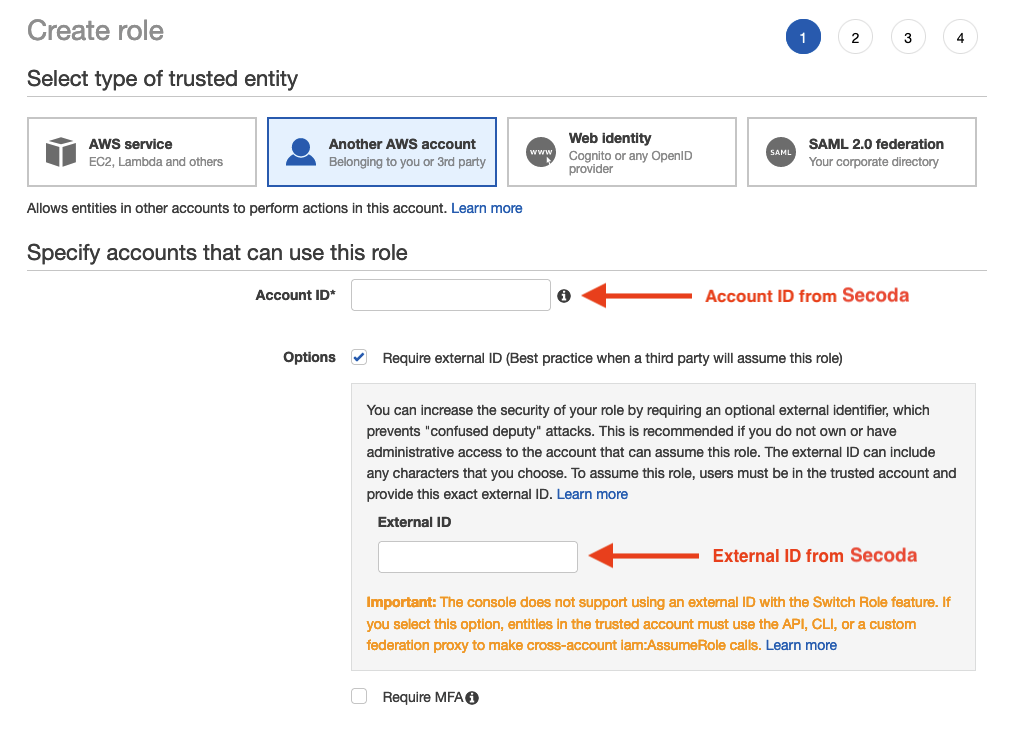
The Secoda UI will display an AWS Account ID and a randomly generated External ID, as shown below, which must be plugged into an IAM Role you create in your AWS account. Store these values for future reference.
Neither the Account ID nor the External ID are secrets, so don't worry about keeping them somewhere secure.
From your AWS console, navigate to IAM > Roles and click Create Role.
Under Select type of trusted entity, choose Another AWS account.

Proceed to attach permissions to the role, choose a name, then create the role.
The exact permission policies you attach depend on which Secoda features you intend to use. Consult the documentation for those services for further guidance. Regardless, make sure to add the permissions
sts:AssumeRoleto your policy.
Copy the Role ARN from AWS IAM and paste it into the Role ARN field in Seoda. Click Create to complete the process.
For more information, read AWS's tutorial on delegating access cross-account using IAM Roles.
Last updated
Was this helpful?