Looker
An overview of the Looker integration with Secoda
There are three steps to connect Looker with Secoda:
Retrieve your Looker Client ID and Client Secret
Retrieve your Looker host
Connect Looker to Secoda
Looker Lineage (Optional)
Retrieve you Looker Client ID and Client Secret
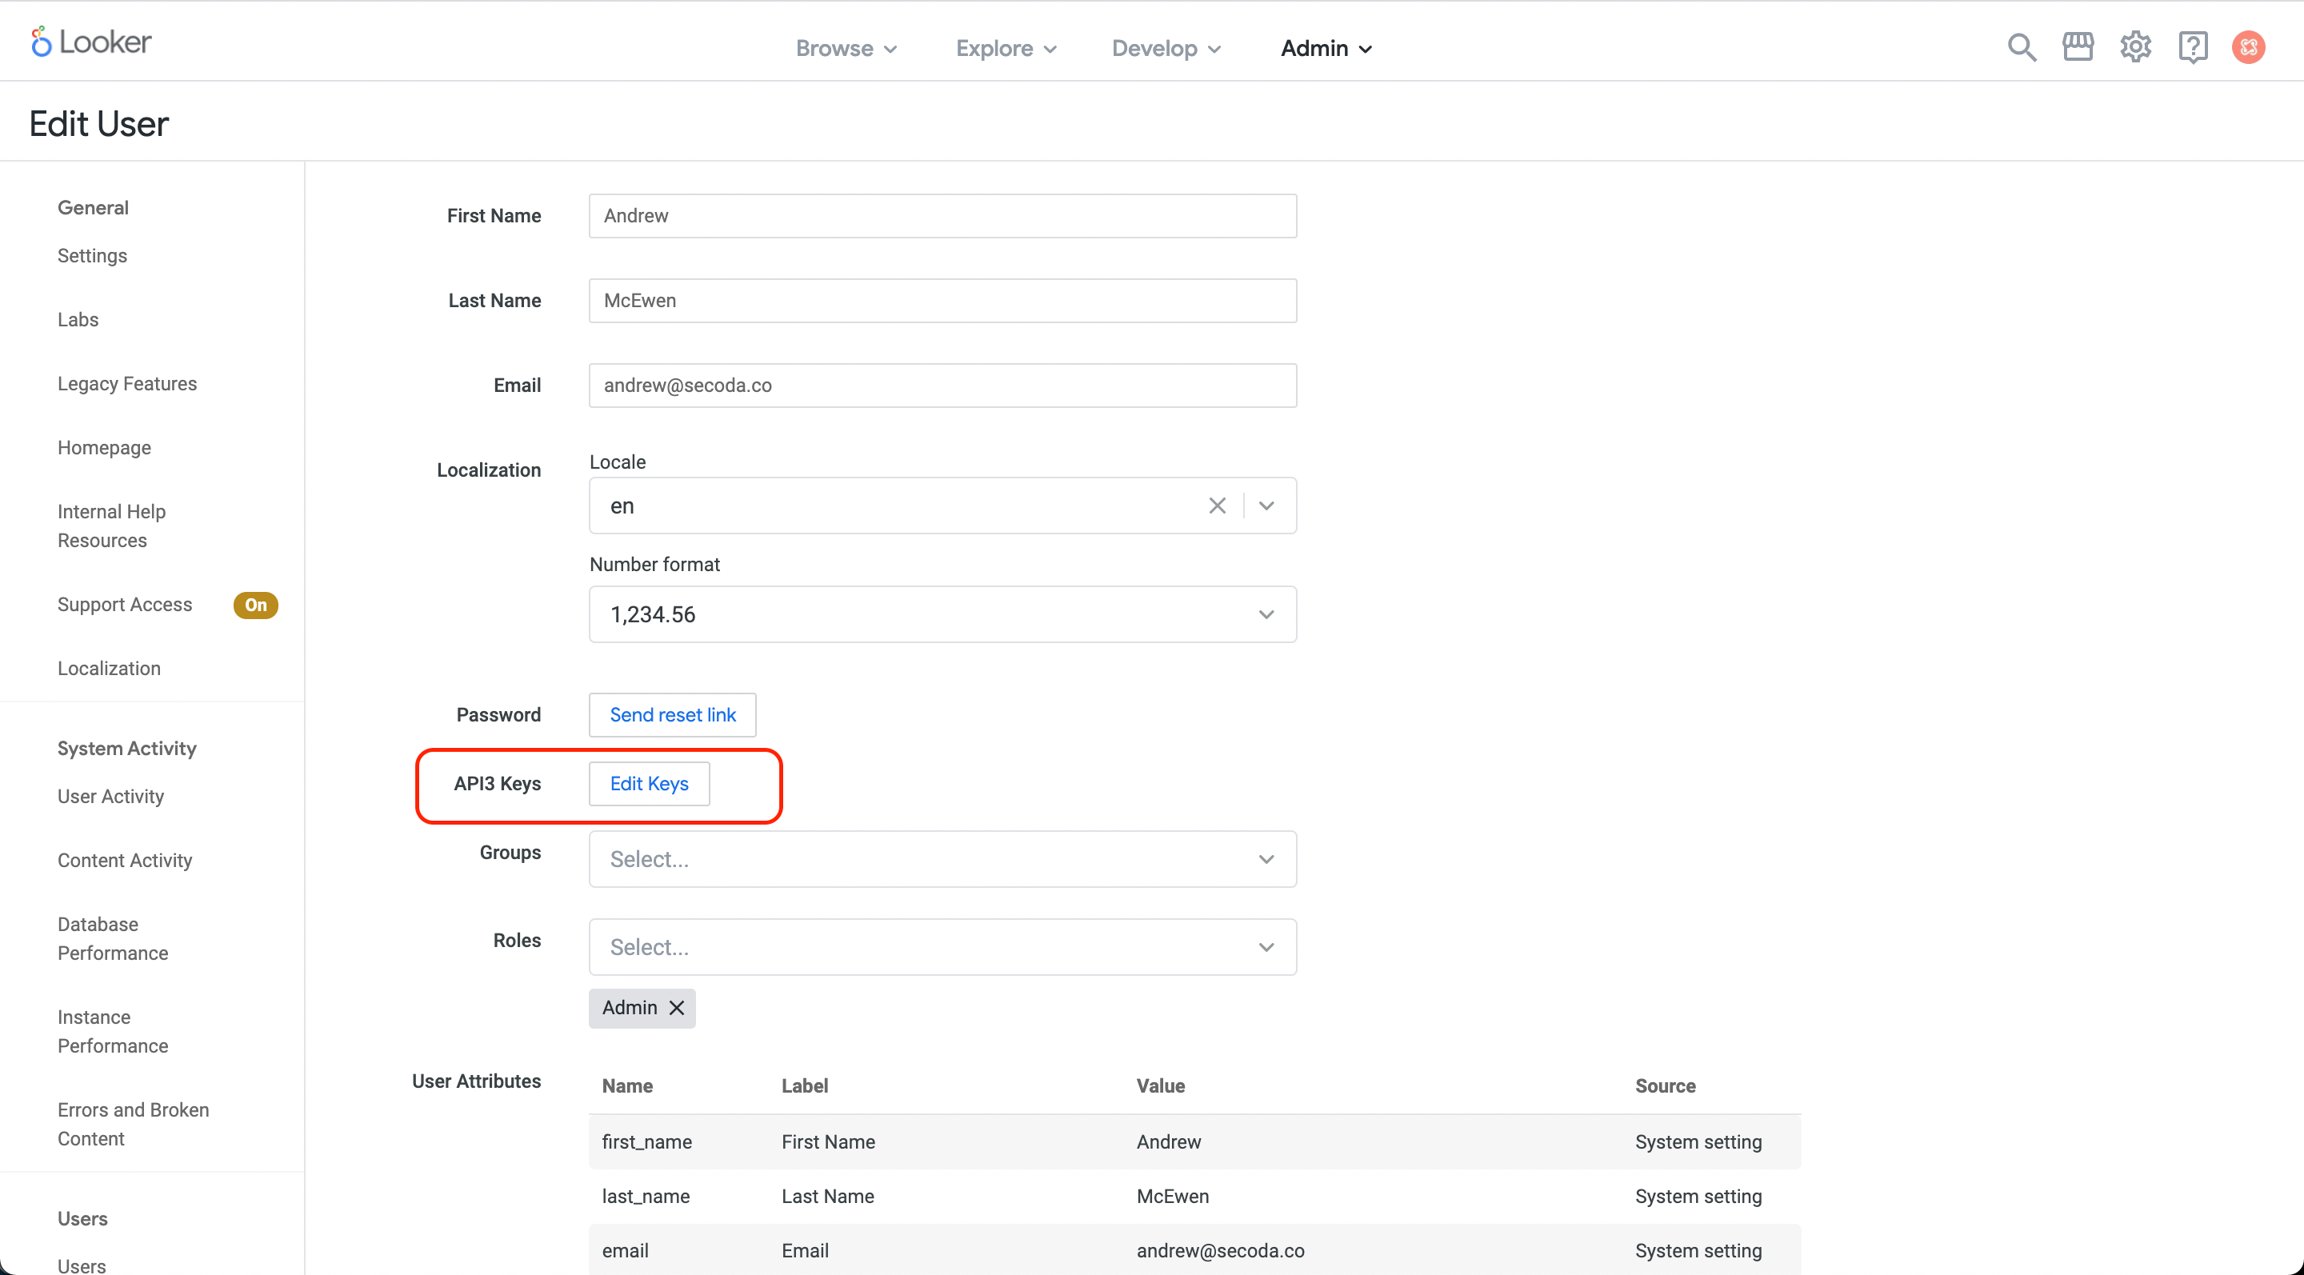
Create API3 credentials on the Users page in the Admin section of your Looker instance. If you’re not a Looker admin, ask your Looker admin to create the API3 credentials for you.
To create an API3 credential, click Edit on a user and then under API3 Keys click Edit Keys.

Create a key, and then save the Client ID and Client Secret
Retrieve your host
Your host is the url of your Looker instance, for example https://company.cloud.looker.com
Sometimes an admin will have specified a custom API url. If that's the case, reach out to your admin and ask them to provide that url.
Connect Looker to Secoda
After retrieving your Looker Client ID, Client Secret, and host , the next step is to connect to Secoda:
In the Secoda App, select Add Integration on the Integrations tab
Search for and select Looker
Enter your Looker Client ID, Client Secret, and host you retrieved above
Click 'Connect'
Connect Looker Lineage (Optional)
To get lineage between Looker and your data warehouse, Secoda will need access your GitHub repo where Looker records changes and manages file versions. Secoda will then automatically detect LookML projects connected to your Looker instance.
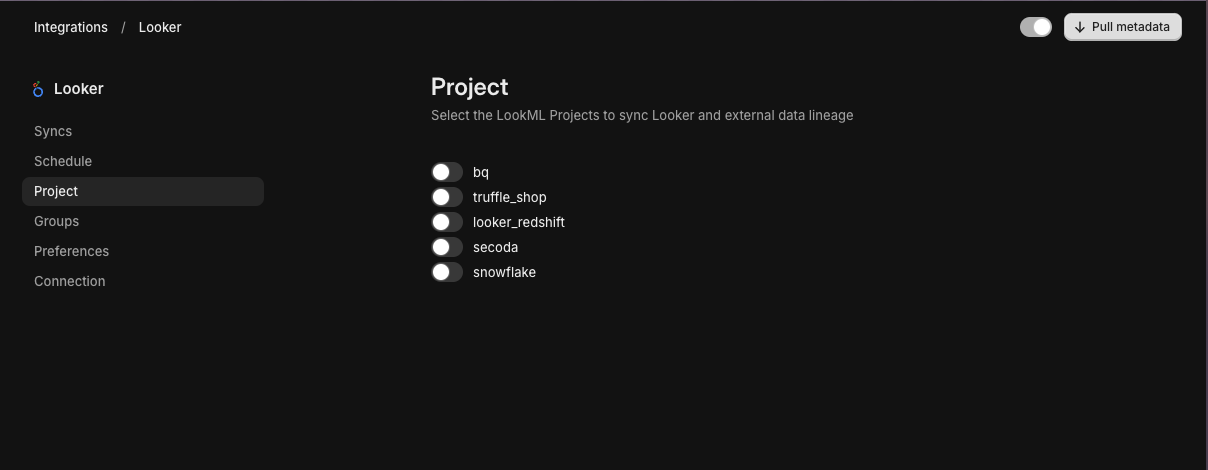
Navigate to the Project tab on the Looker Integration Page and you will see your LookML projects. For each project you want to connect, click the toggle beside the project name.
Once the key is generate, you can select your LookML project and click Copy public key and head to your LookML repo in GitHub.

GitHub
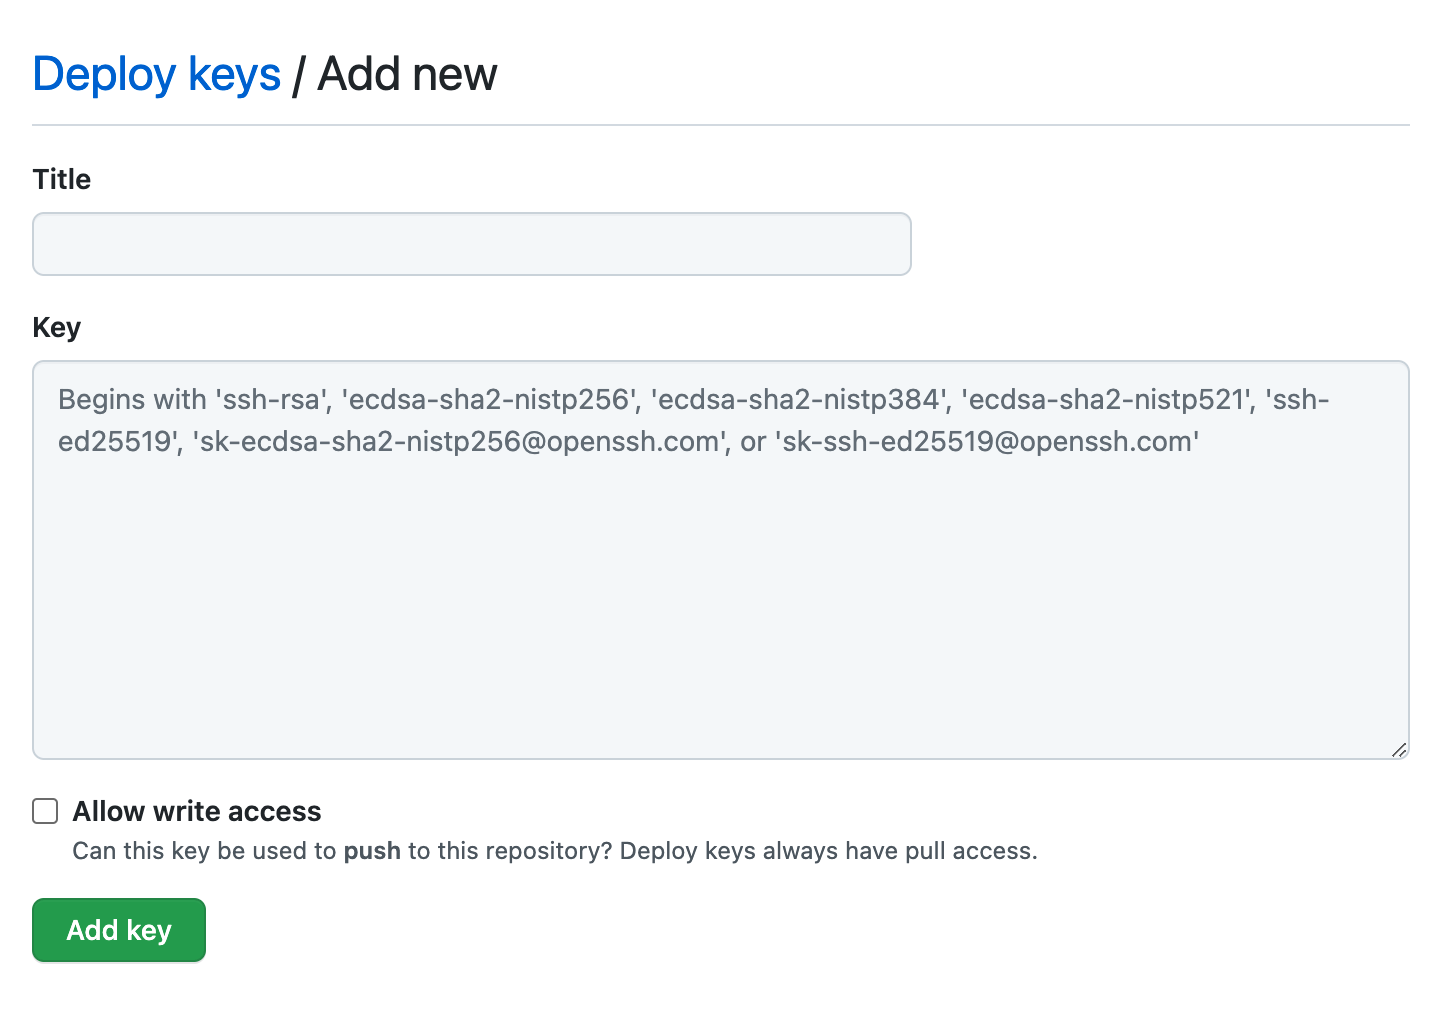
Once in your GitHub repo, click on Settings > Deploy keys on the sidebar.
A new key can be added by clicking on Add deploy key button in the top right corner.

Set a title for your new key and then paste the key copied from Secoda into the Key text field.

GitLab
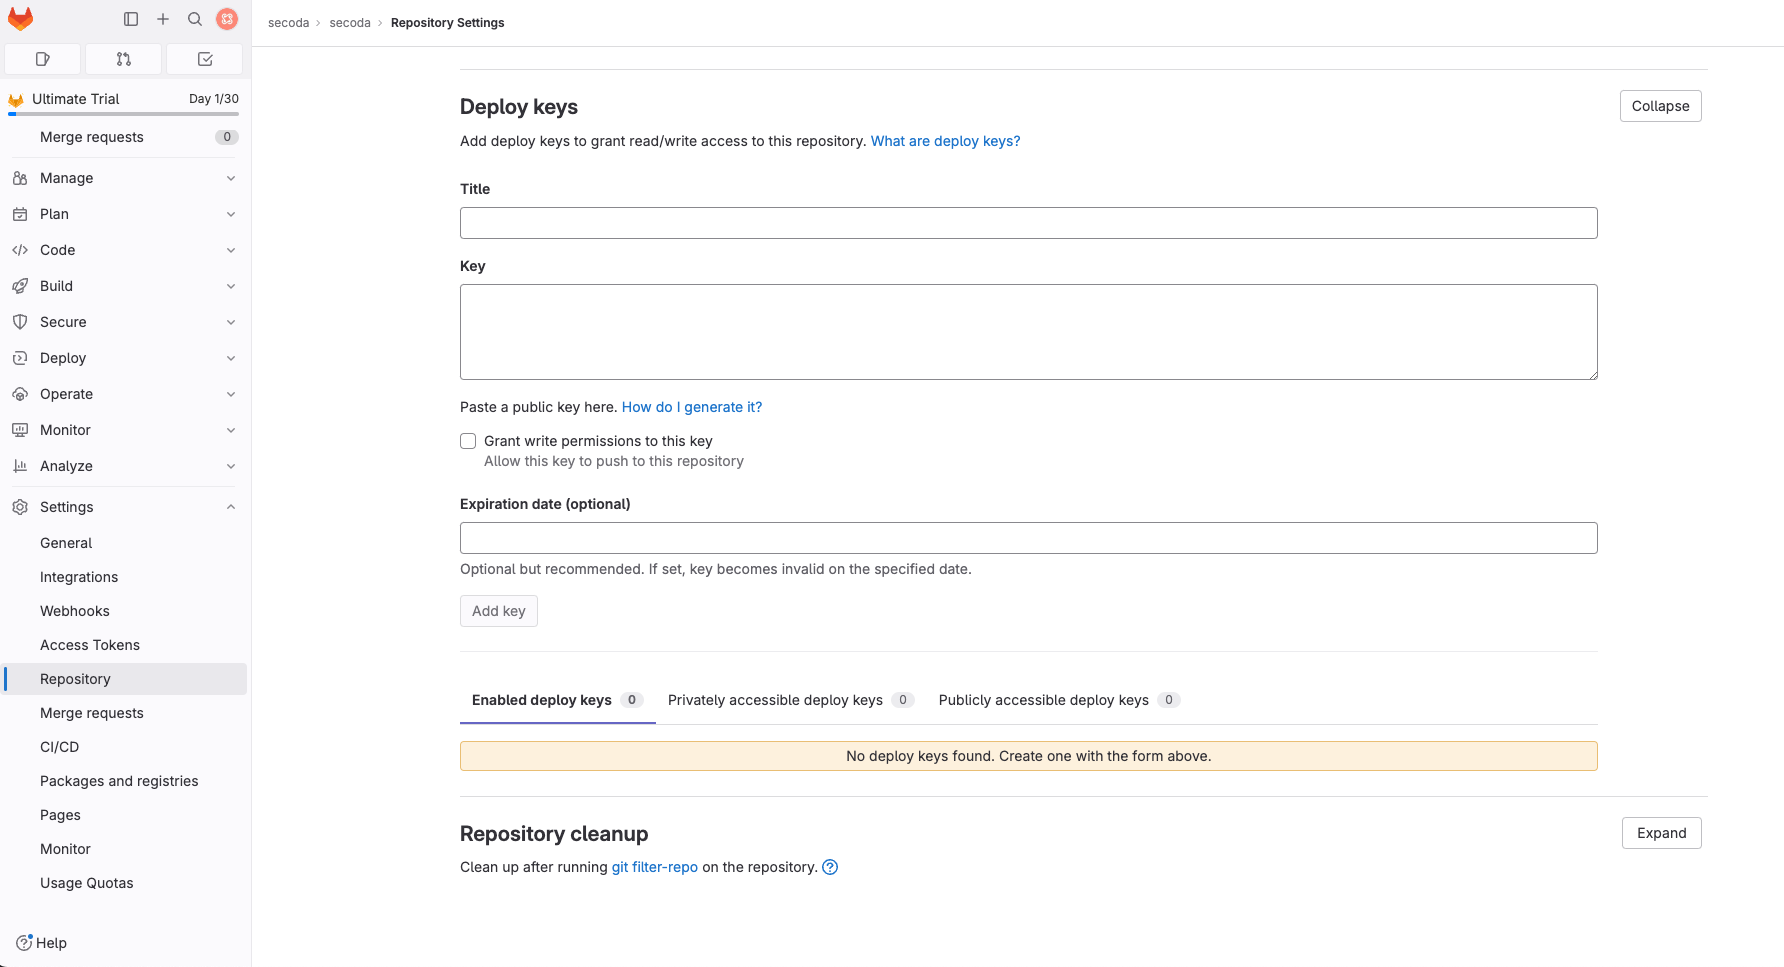
Once in your GitLab repo, click on Settings > Deploy keys on the sidebar.

Set a title for your new key and then paste the key copied from Secoda into the Key text field.
Click Add key. You DO NOT need to provide write access
Once the key has been added to GitHub or GitLab go back to your Looker integration in the Secoda App and go to the Sync History tab and click on Run Sync in the top right corner to start the sync process.
Note: You DO NOT need to start the sync process if you would rather wait until the next scheduled sync.
Last updated
Was this helpful?