> For the complete documentation index, see [llms.txt](https://docs.secoda.co/llms.txt). Markdown versions of documentation pages are available by appending `.md` to page URLs; this page is available as [Markdown](https://docs.secoda.co/integrations/data-visualization-tools/power-bi.md).
# Power BI
## **Getting Started with Power BI**
There are two options for setting up the Power BI integration on Secoda, OAuth (into Secoda's managed Azure AD App) or by creating and managing your own Azure AD App.
## Option 1: OAuth
**You must be a PowerBI admin to connect through OAuth.**
The PowerBI integration uses OAuth 2.0 to connect Secoda to your Power BI workspace. To connect Power BI to Secoda follow the steps below:
1. In the Integrations section, click on New Integration, and select PowerBI.
2. Navigate to the OAuth tab, and click Connect with OAuth. You will be prompted to log in to your PowerBI Workspace.
3. Upon successful completion of OAuth authentication with Power BI, click the Run Initial Sync button to begin a sync.
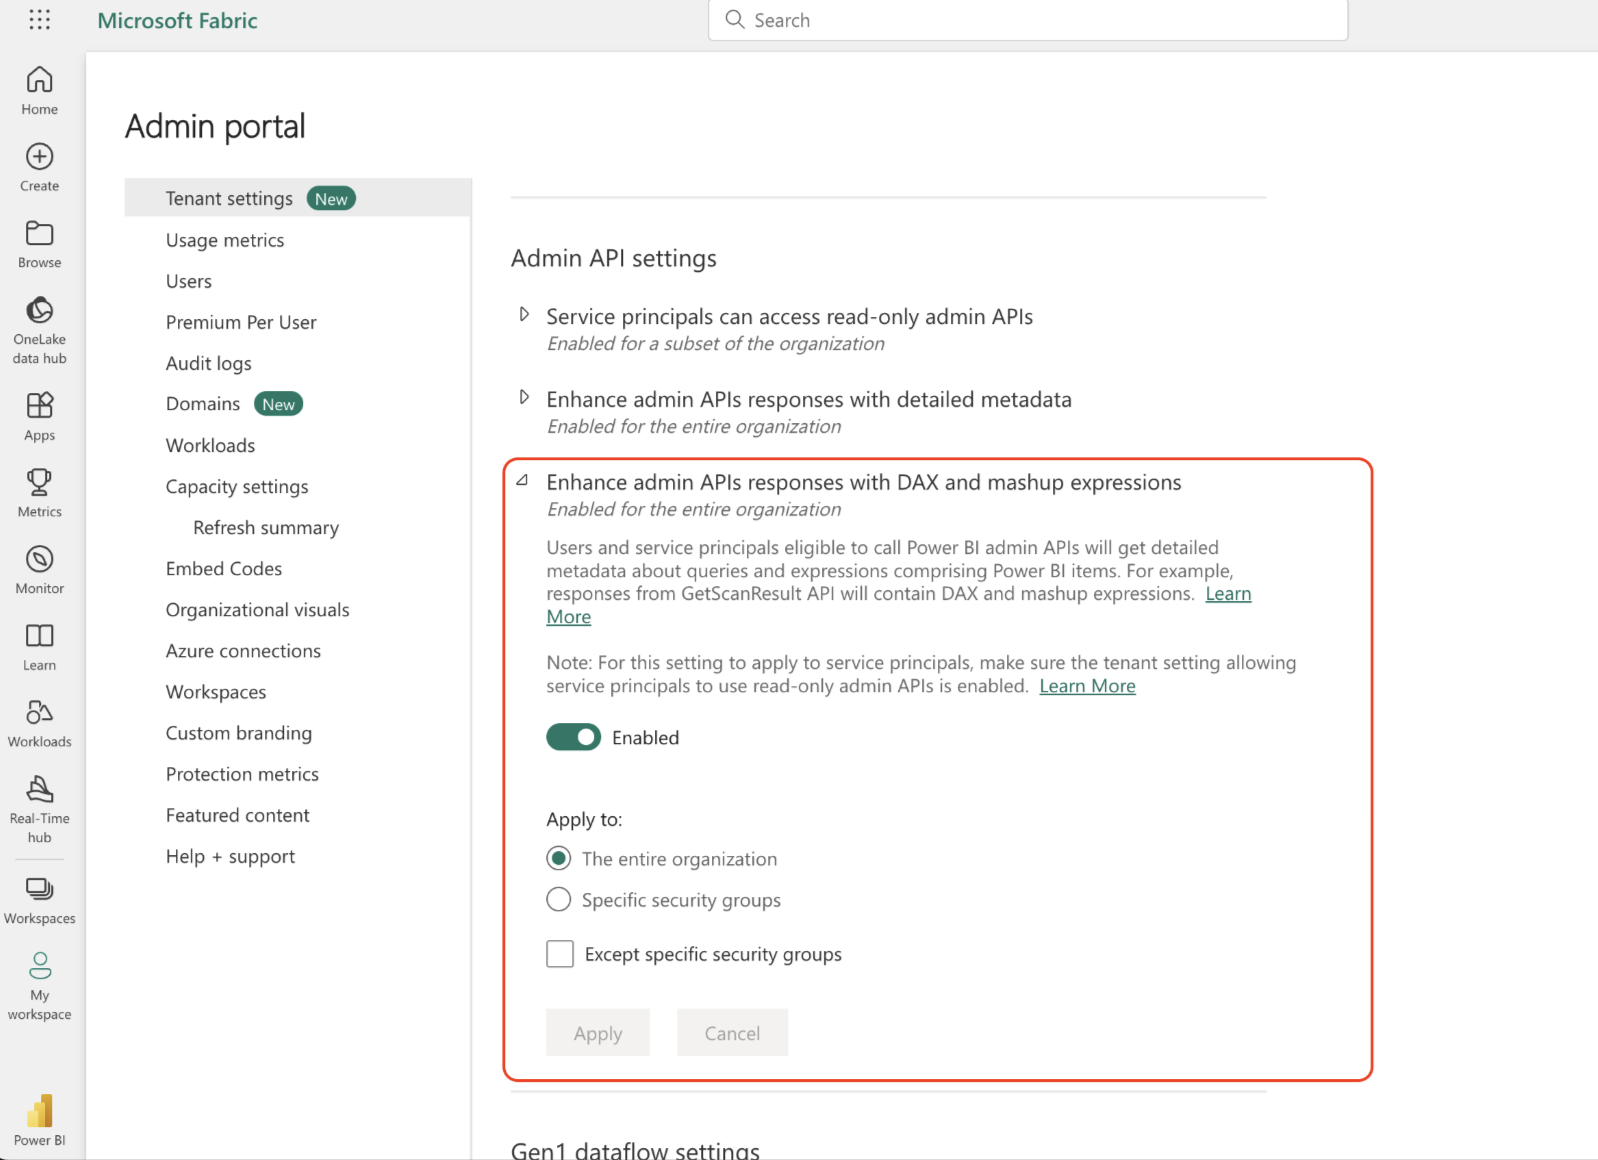
To see Lineage to your PowerBI resources from external sources, make sure you enable the following settings in the Tenant tab of the Admin API Settings section in PowerBI:
* Allow service principals to use read-only admin APIs
* Enhance admin APIs responses with detailed metadata
* Enhance admin APIs responses with DAX and mashup expressions and click apply to the entire organization
## Option 2: Azure AD App
### Step 1 -> Create an Azure AD App
1. Open the [Azure portal](https://portal.azure.com/)
2. Search for App registrations and start a new Registration
3. In the New Registration form, fill in the following details:
* Name: Secoda
* Supported account types: Accounts in this organizational directory only (Default Directory only - Single tenant)
* Redirect URI: Leave blank
4. Click Register to submit the form. You'll now be able to access an Application ID and Tenant ID from the Overview tab. Save these values.
### Step 2 -> Create a Client Secret
1. In the certificates and Secrets tab, click the New Client Secret button.
2. The description and expiry of the client secret is up to you. Click Add, and save the Client Secret value.
### Step 3 -> Enable API Access
Whether you set up Admin or non-admin access APIs is up to you. Admin access enables the sync of tables, columns, and measures from PowerBI datasets. These resources are used to build lineage between PowerBI and other sources (ex. Snowflake). **You will not be able to see lineage between PowerBI and other sources if are not using Admin APIs.**
Setting up Admin API Access (Recommended)
**In the Azure Portal:**
1. Navigate to the Azure Active Directory link.
2. In the Groups tab, create a new group with the following **required** information.
* Group type: Security
* Group name: PowerBI API Access
3. Search for and select Secoda in the Members list. Click Create to complete the process.
**In Power BI:**
1. Navigate to the tenant settings page. You must be a Power BI admin to see this page.
2. In the Tenant settings tab, navigate to the Developer Settings section, and enable the following setting:
* Service principals can call Fabric public APIs (Make sure to add the PowerBI API Access Group you created in the previous step)
3. Admin API Settings section under the Tenant settings tab, enable the following settings:
* Allow service principals to use read-only admin APIs
* Enhance admin APIs responses with detailed metadata
* Enhance admin APIs responses with DAX and mashup expressions
Setting up Non-Admin API Access
1. In the Azure Portal, navigate to the API Permissions tab and click Add a Permission.
2. The following permissions, under the PowerBI Service, must be added to enable access by Secoda.
* Dashboard Read All
* Dataflow Read All
* Dataset Read All
* Gateway Read All
* Pipeline Read All
* Report Read All
* Workspace Read All
### **Step 4 -> Add Azure AD to your PowerBI Workspace**
1. Sign into PowerBI, and navigate to the workspaces you want to enable access to. Use the three dots on the right of the workspace name to select Workspace Access.
2. Fill in the Workspace Access form with the following required information. Make sure to click Add and close the form to persist the changes.
* Member: Secoda
* Permission: Contributor

### Step 5 ->Add the PowerBI Integration To Secoda
1. In the Integrations section, click on New Integration, and select PowerBI.
2. Navigate to the Managed tab, and fill in the form with the required information from the previous steps.
* **Client ID:** Application ID of Azure AD.
* **Tenant ID:** Identifier of tenant of organization in Azure Active AD.
* **Client Secret:** Client secret of the Azure AD App
{% hint style="info" %}
If you have any trouble connecting PowerBI, get in touch at .
{% endhint %}
## FAQ
What is displayed when previewing a PowerBI workbook?
When previewing PowerBi workbooks, Secoda will show the dashboard related to the workbook. If no dashboard is found, Secoda will show the first sheet or view related to the workbook.
{% hint style="info" %}
Preview of PowerBI resources is available in Secoda to Power BI Pro or Premium Per User (PPU) licensed users who have access to the requested resource.
{% endhint %}
---
# Agent Instructions
This documentation is published with GitBook. GitBook is the documentation platform designed so that both humans and AI agents can read, navigate, and reason over technical content effectively. Learn more at gitbook.com.
## Querying This Documentation
If you need additional information that is not directly available in this page, you can query the documentation dynamically by asking a question.
Perform an HTTP GET request on the current page URL with the `ask` query parameter, and the optional `goal` query parameter:
```
GET https://docs.secoda.co/integrations/data-visualization-tools/power-bi.md?ask=&goal=
```
`ask` is the immediate question: it should be specific, self-contained, and written in natural language.
`goal` is optional and describes the broader end goal you are ultimately trying to accomplish on behalf of the user. GitBook uses it to tailor the answer towards what is most useful for that goal.
The response will contain a direct answer to the question and relevant excerpts and sources from the documentation.
Use this mechanism when the answer is not explicitly present in the current page, you need clarification or additional context, or you want to retrieve related documentation sections.