Catalog

The Catalog is where the metadata from your connected integrations live.

Introduction

The Catalog is your central hub for all metadata from your connected integrations. Once an integration is connected, its metadata populates the Catalog, making it ready for organization and management.

Adding Catalog Metadata to Teams

By default, metadata is assigned to the 'General' team. To manage and reassign metadata to different teams within your workspace, follow these steps How to add integrations.

Editing in the Catalog

For efficient management of multiple resources, learn how to perform bulk edits in the Catalog view here Bulk Editing.

Applying Filters to the Catalog

Enhance your navigation within the Catalog by applying filters. Detailed instructions can be found here Applying Filters in Catalog.

Creating and Managing Catalog Views

Create custom filtered Views of the Catalog to streamline access to frequently used resources. Learn how to create these Views here Views.

Watch this helpful video to learn how to navigate through the Catalog effectively.

Exporting Catalog Metadata

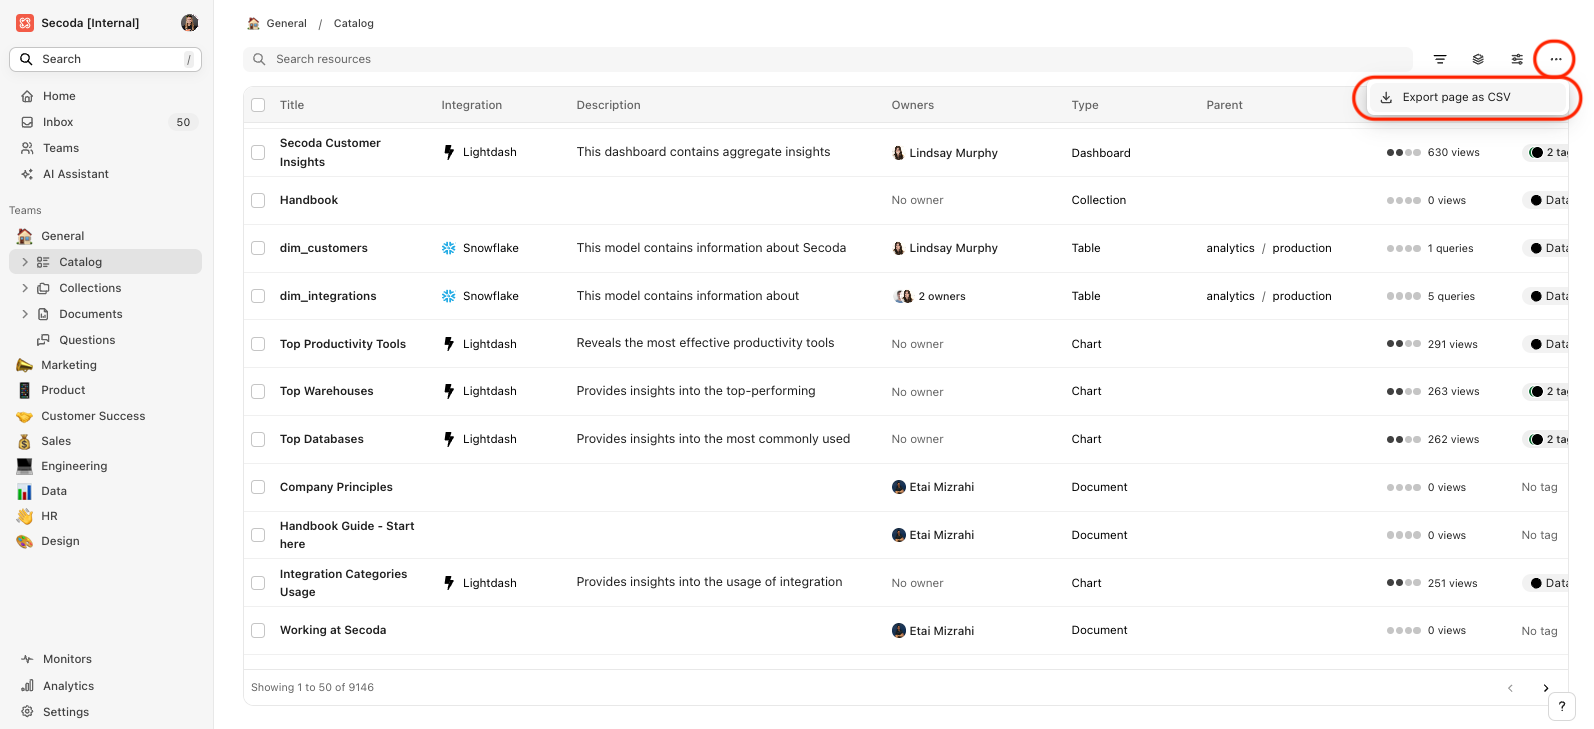
  • Export a Filtered Subset of Resources: Admins and Editors can export data from the Catalog to a CSV file. After setting the desired filters, use the three-dot menu and select 'Export page as CSV'.

  • Comprehensive Exporting: For detailed guidance on exporting all Catalog resources, refer to our full documentation on Import and Export Resources.

Limiting Resource Access in a Catalog

Create custom access rules to limit access to particular tables or columns without exposing the entire integration. For step-by-step instructions on adding resources to teams one-by-one, follow these steps using Automations to pull that subset of resources:

To add resources one-by-one, follow these steps:

Reordering and Sorting Catalog Columns

Admins can customize the display of columns to emphasize key information. To rearrange columns, click 'Rearrange columns' and drag the desired metadata to a more prominent position at the top of the list. See the demonstration in the gif below for a visual guide.

For sorting, click on the desired column header, then choose either ascending or descending order.

These adjustments will apply universally across the workspace, enhancing visibility for all users.

Last updated