> For the complete documentation index, see [llms.txt](https://docs.secoda.co/llms.txt). Markdown versions of documentation pages are available by appending `.md` to page URLs; this page is available as [Markdown](https://docs.secoda.co/integrations/data-warehouses/databricks-integration.md).
# Databricks
{% content-ref url="/pages/ZAVVCXGCNo9Wc5cfG0jG" %}
[Databricks Metadata Extracted](/integrations/data-warehouses/databricks-integration/metadata-extracted.md)
{% endcontent-ref %}
## **Getting Started with Databricks**
There are three steps to get started using Databricks with Secoda:
1. Create an access token
2. Connect Databricks to Secoda
3. Whitelist Secoda IP Address
### Create an access token
In your Databricks console go to the **User Settings** and generate a new access token. Save the value to be used to connect Databricks to Secoda in the second step.
{% hint style="info" %}
To have query history and popularity you must provide admin privileges to the token.
{% endhint %}
%20\(1\).png)
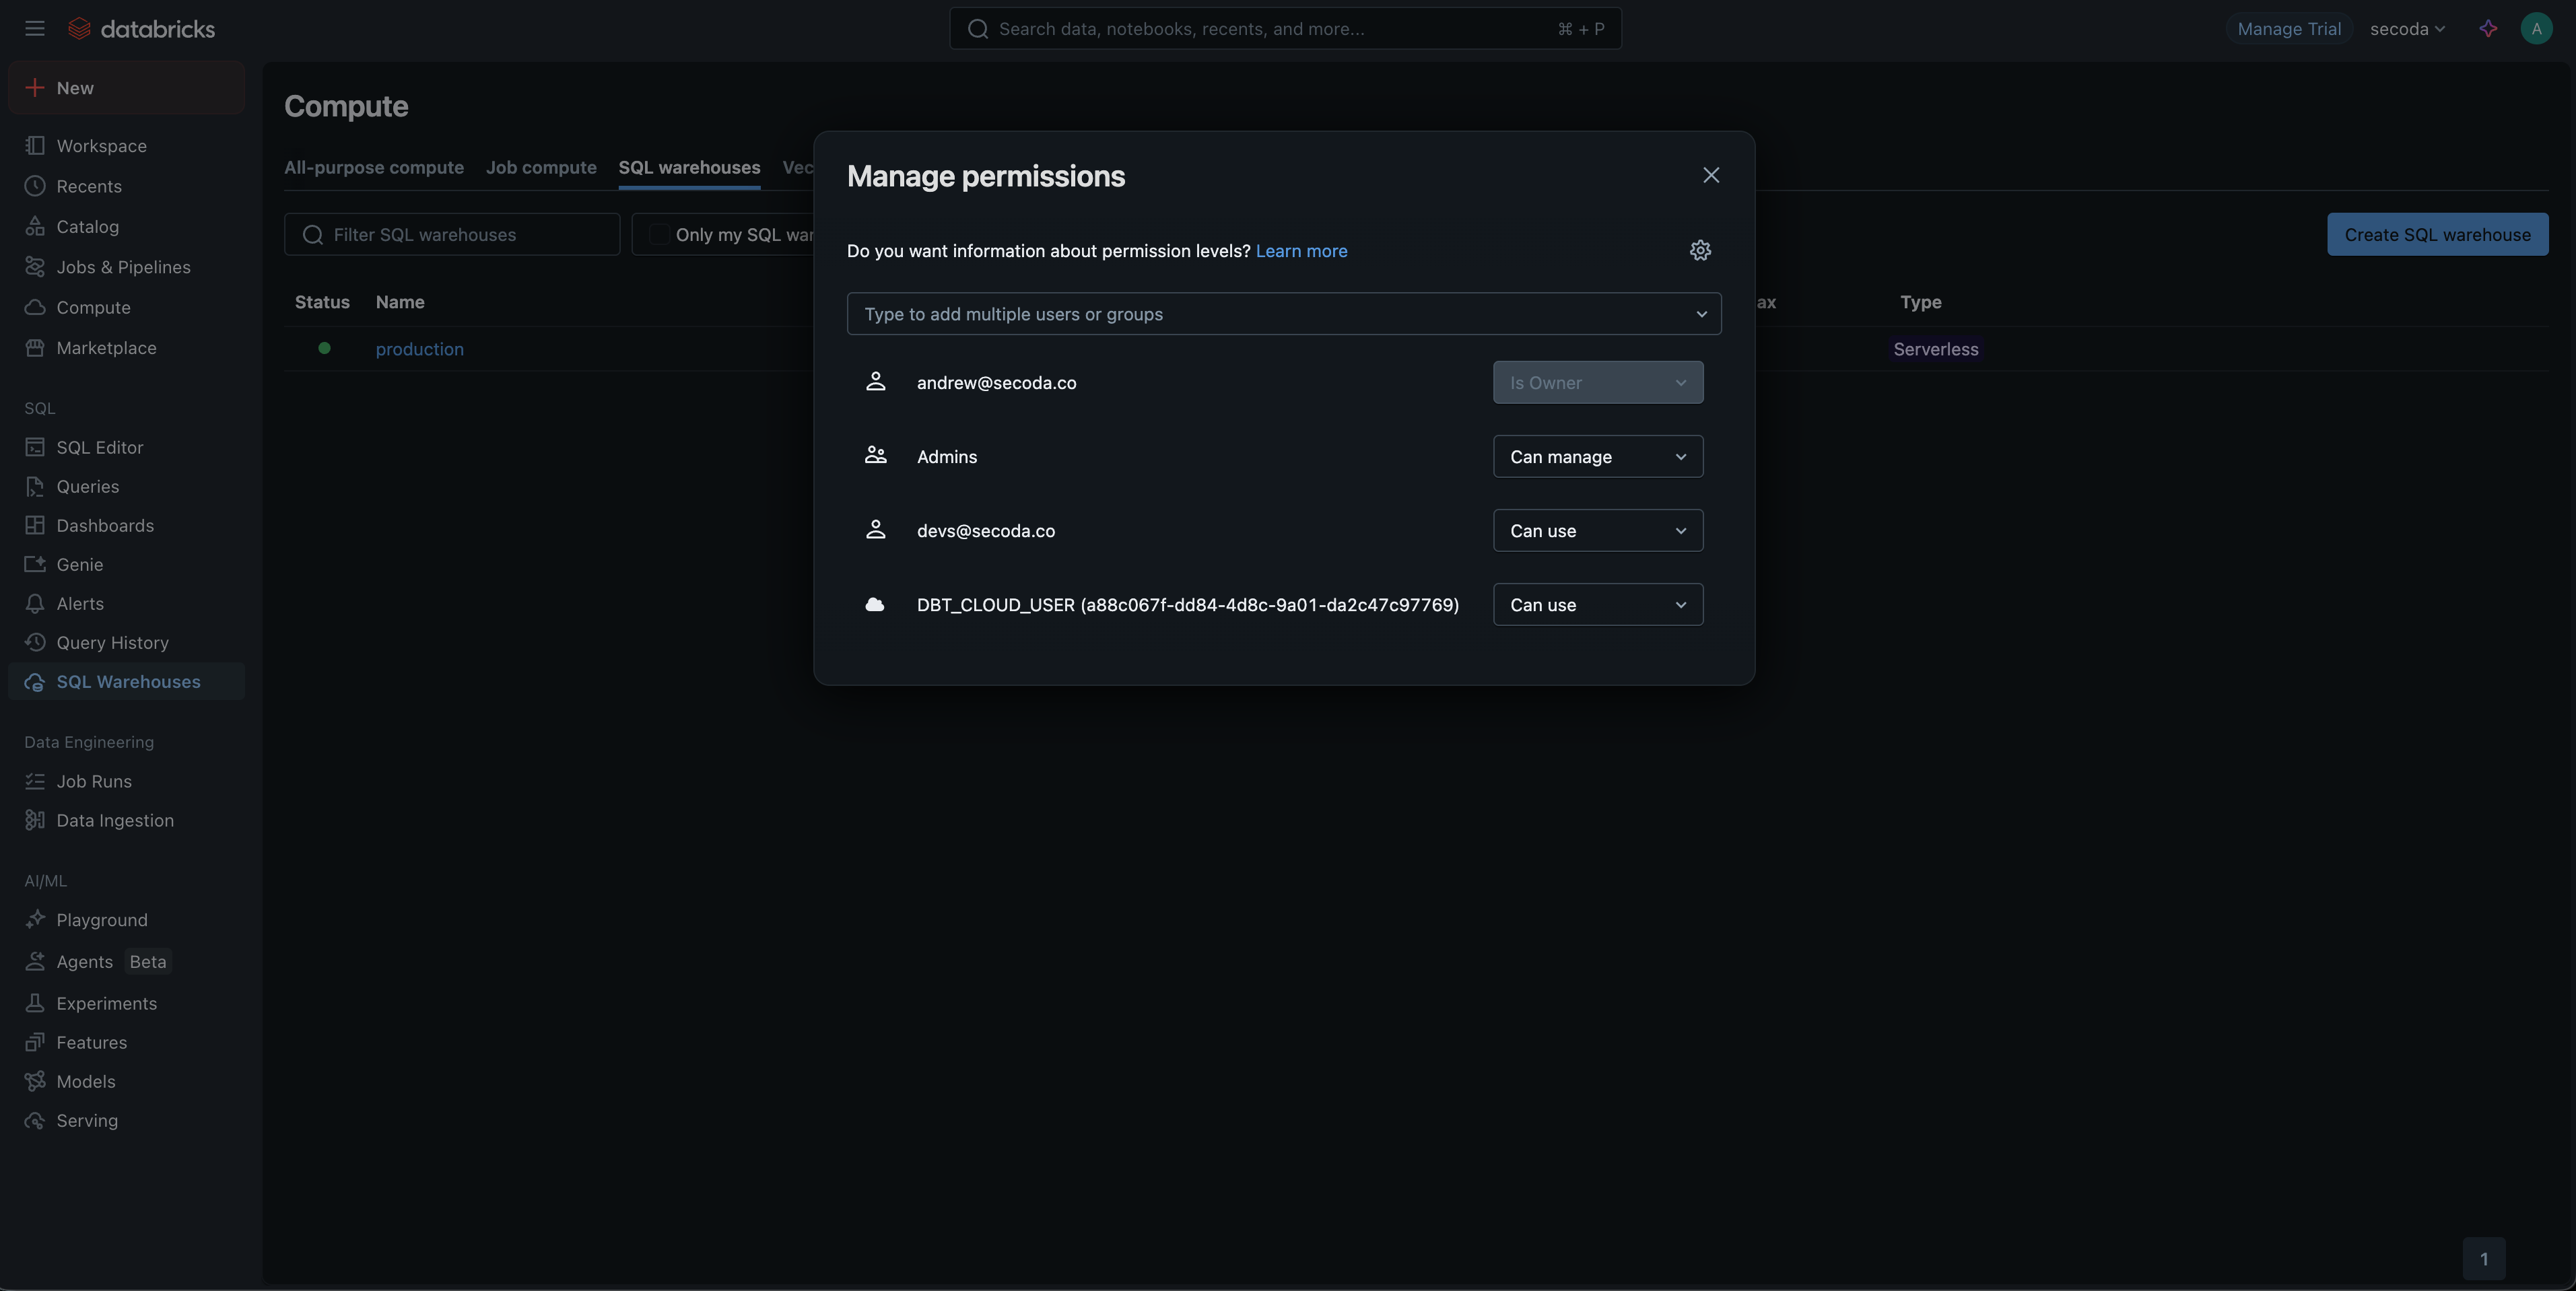
### Grant Secoda Access
For each warehouse you plan to connect to Secoda, the credentials must have `Can monitor` permissions (set via `SQL Warehouses > [My Warehouse] > Permissions`).
{% hint style="info" %}
`Can use` can be selected but will not allow for any warehouse-level query history to be accessed. `Can view` does not provide sufficient permissions
{% endhint %}
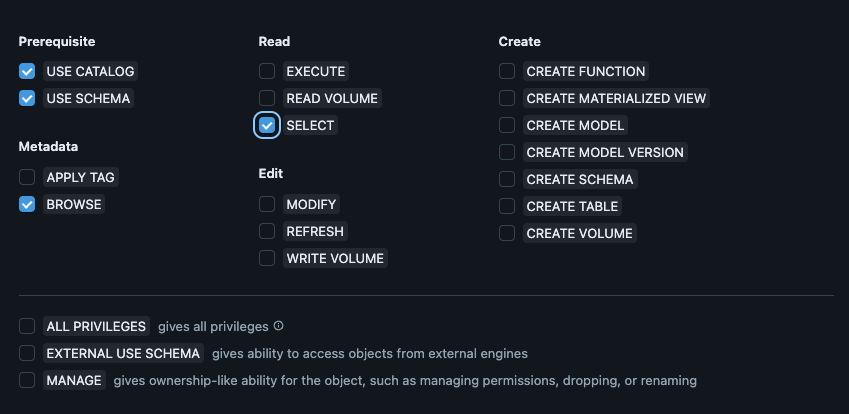
For each catalog you want to connect to Secoda, the credentials must have the following permissions:
* `USE_CATALOG`
* `USE_SCHEMA`
* `BROWSE`
* `SELECT`
### Connect Databricks to Secoda
Go to and select the Databricks integration.
Enter in the following credentials:
* **Host:** This is the URL of your Databricks workspace, i.e, [dbc-dc31b5a2-597d.cloud.databricks.com](https://dbc-dc31b5a2-597d.cloud.databricks.com/)
* **Databricks Workspace Id:** The numerical id of your workspace, located in the url of your Databricks instance, after the "/?o=". `https://.cloud.databricks.com/?o=`.\\
* **Access Token:** The access token you generated in the first step
* **Warehouse ID (Recommended) or Cluster ID:** This is the resource what SQL queries will run on. For the optimal experience, use a [Databricks serverless SQL warehouse](https://docs.databricks.com/en/admin/sql/serverless.html).
{% hint style="info" %}
To ingest table and column level lineage using Databricks Unity Catalog, a Warehouse ID must be specified.
{% endhint %}
After entering in the information into Secoda, click "Test Connection". After the connection is successful your can Submit and run the initial extraction.
### Whitelist Secoda IP Address
If your Databricks instance is behind a firewall, you'll have to whitelist [Secoda's IP address](/faq.md#what-are-the-ip-addresses-for-secoda) to allow for metadata extractions.
### FAQs
What cloud providers are supported?
Databricks on the major cloud providers including AWS, GCP, and Azure are supported.
---
# Agent Instructions
This documentation is published with GitBook. GitBook is the documentation platform designed so that both humans and AI agents can read, navigate, and reason over technical content effectively. Learn more at gitbook.com.
## Querying This Documentation
If you need additional information that is not directly available in this page, you can query the documentation dynamically by asking a question.
Perform an HTTP GET request on the current page URL with the `ask` query parameter, and the optional `goal` query parameter:
```
GET https://docs.secoda.co/integrations/data-warehouses/databricks-integration.md?ask=&goal=
```
`ask` is the immediate question: it should be specific, self-contained, and written in natural language.
`goal` is optional and describes the broader end goal you are ultimately trying to accomplish on behalf of the user. GitBook uses it to tailor the answer towards what is most useful for that goal.
The response will contain a direct answer to the question and relevant excerpts and sources from the documentation.
Use this mechanism when the answer is not explicitly present in the current page, you need clarification or additional context, or you want to retrieve related documentation sections.