Looker Studio
An overview of the Looker Studio integration with Secoda
Secoda has two methods of integrating with Looker Studio: retrieving a session cookie and using Google OAuth
NOTE: Using the Google OAuth method does not extract upstream (datasources) and downstream (charts) lineage due to the limitations of the Looker Studio API
NOTE: The session cookies expire after 12 hours and you need to re-retrieve the cookie each time you wish to run the extraction.
Getting Started with Google OAuth
There are two steps to get started using Looker Studio with Secoda through Google OAuth:
Authorize Secoda for your Organization
Connect Looker Studio to Secoda
Authorize Secoda on Google Admin
Sign in to your Google Admin console and navigate to domain wide delegation.
In
API clients, click Add new.Enter the Client ID:
884425733446-7lao52vmjg9k7hovpgba2qd5b7qeo8l2.apps.googleusercontent.comEnter the following OAuth scopes:
https://www.googleapis.com/auth/datastudiohttps://www.googleapis.com/auth/userinfo.profile
Click Authorize.
Connect to Looker Studio
In Secoda, head to the Integrations page and click New integration
Select Looker Studio and click on the OAuth tab
Click the
Connect with OAuthbutton and login using your Google accountHead to the History tab on the side bar and click Run extraction
Getting Started with Session Cookies
There are two steps to get started using Looker Studio with Secoda through session cookies:
Retrieve a Looker Studio session cookie
Connect Looker Studio to Secoda
Retrieve Session Cookie
Secoda uses a series of REST APIs that Looker Studio uses for its platform, which requires a session cookie. To get a session cookie follow these steps:
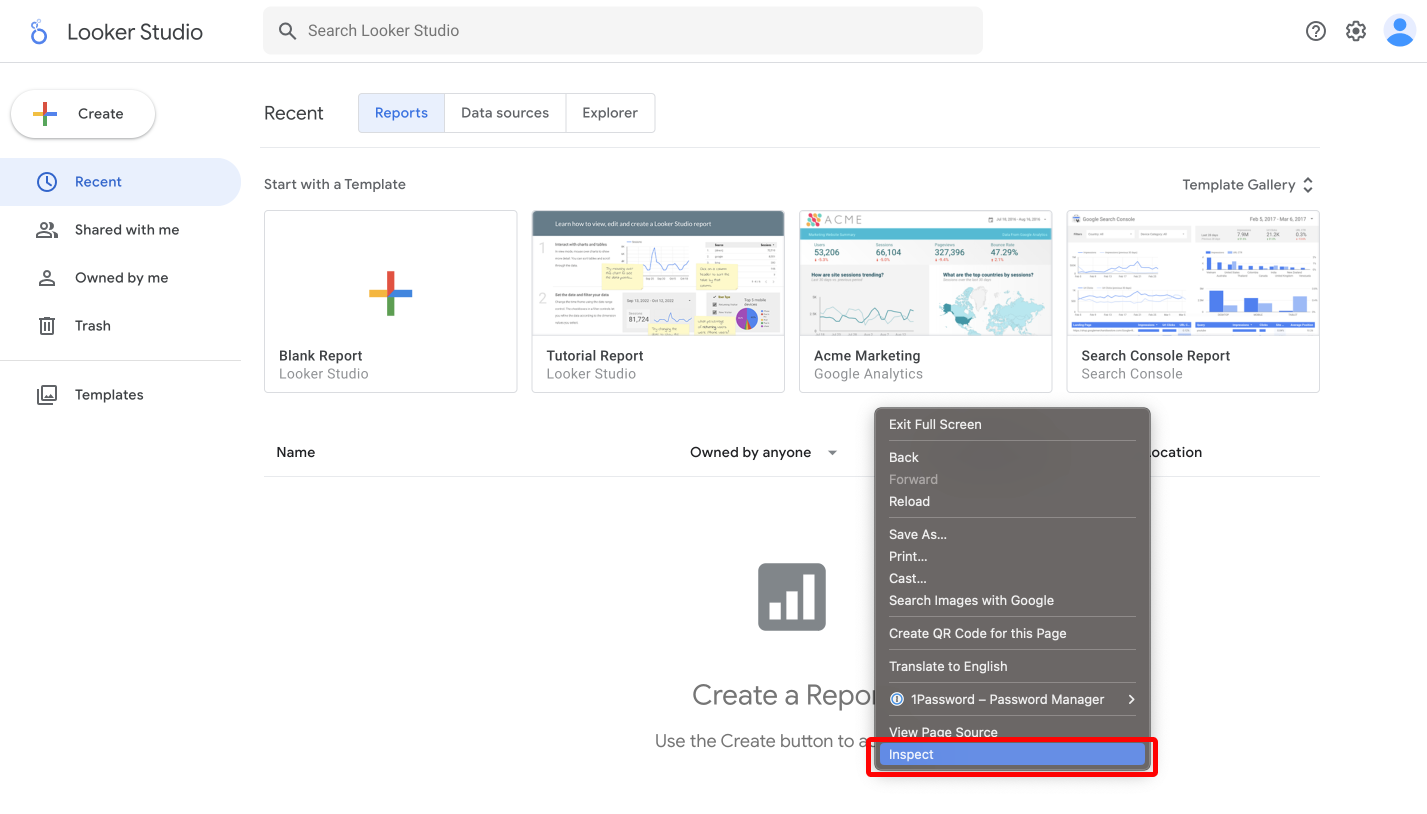
Login to Looker Studio and open the developer tools by right-clicking and selecting Inspect

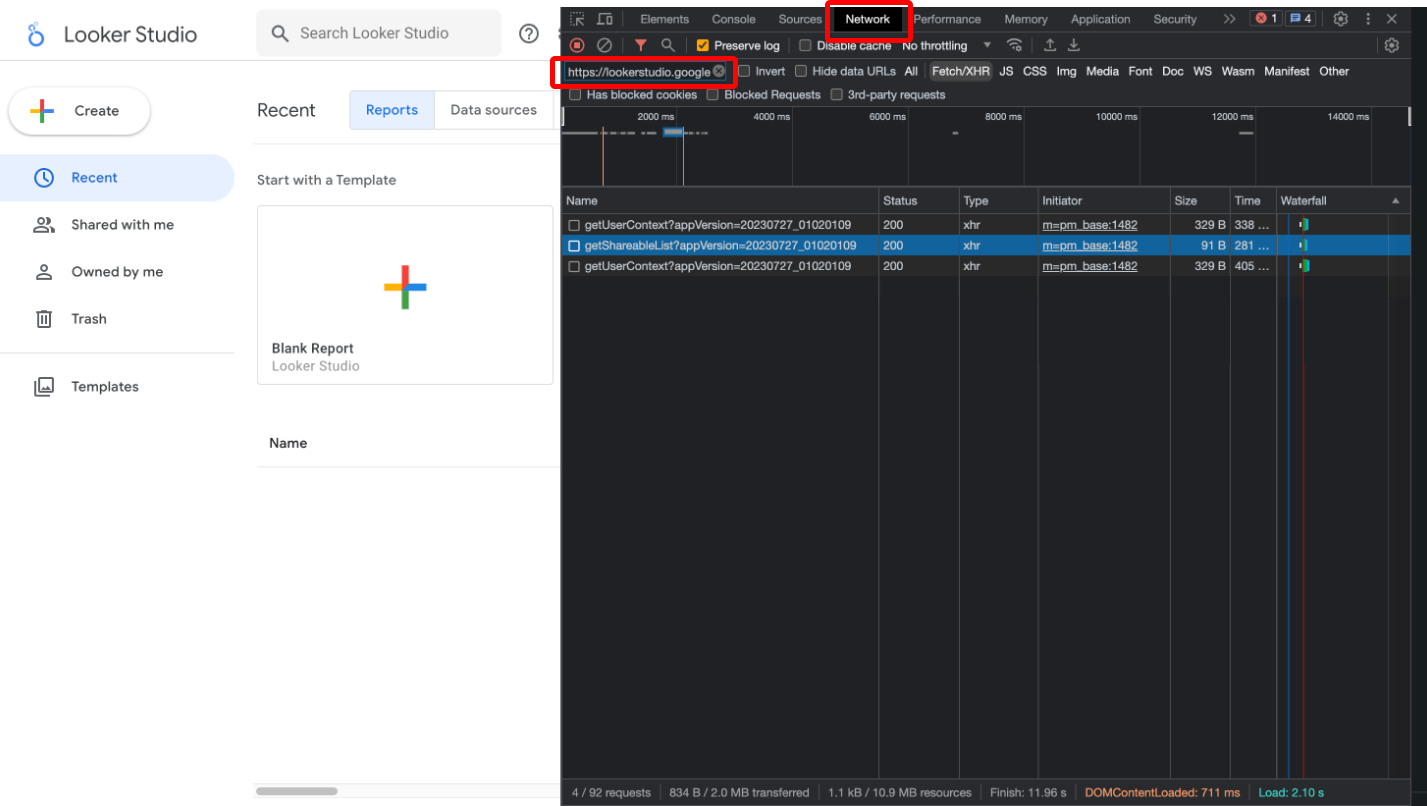
2. Click on the Network tab and put https://lookerstudio.google.com in the filter field

3. Refresh the page and you should see some requests populate
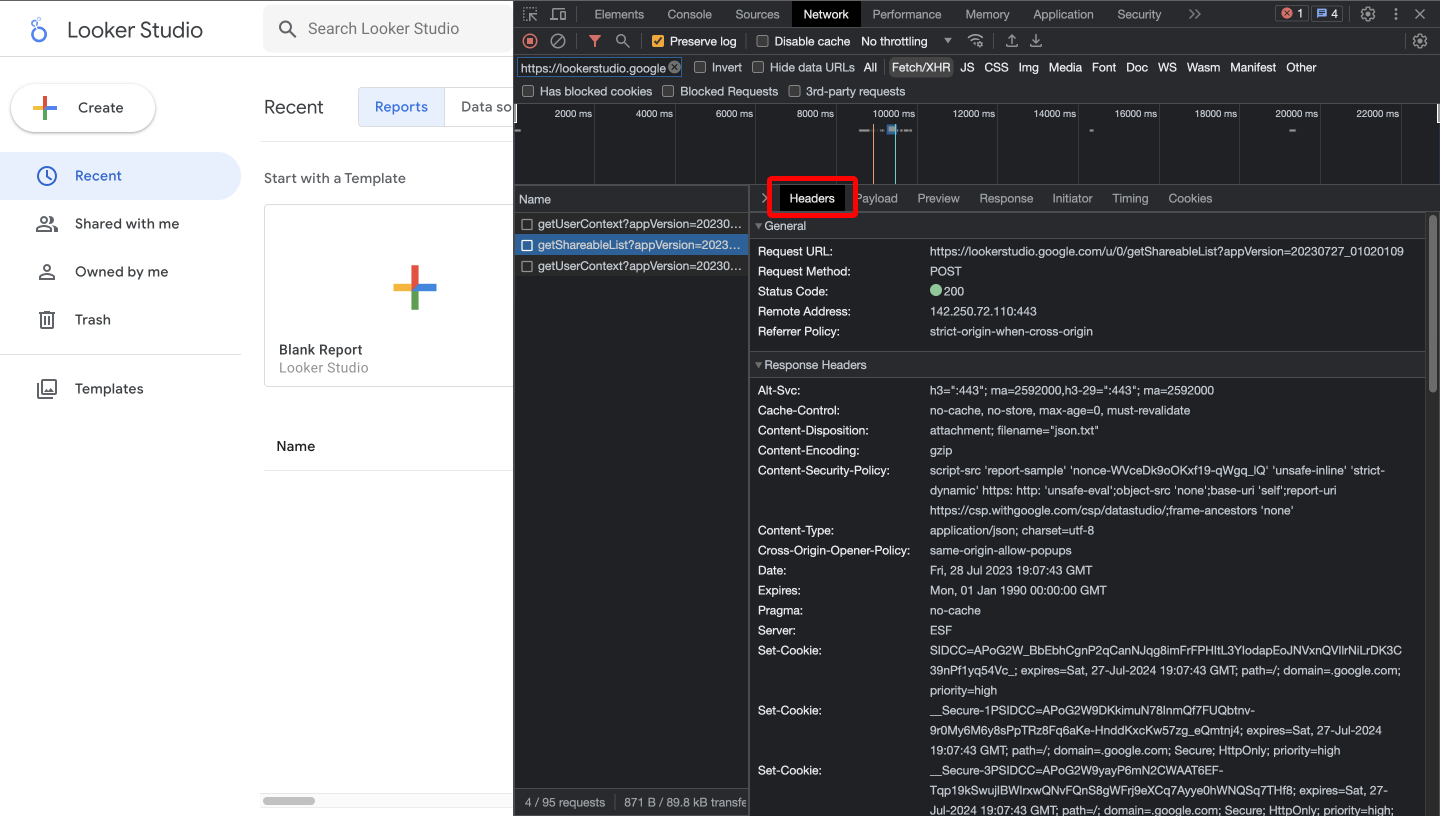
4. Click on the getShareableList network request and then navigate to the Headers tab

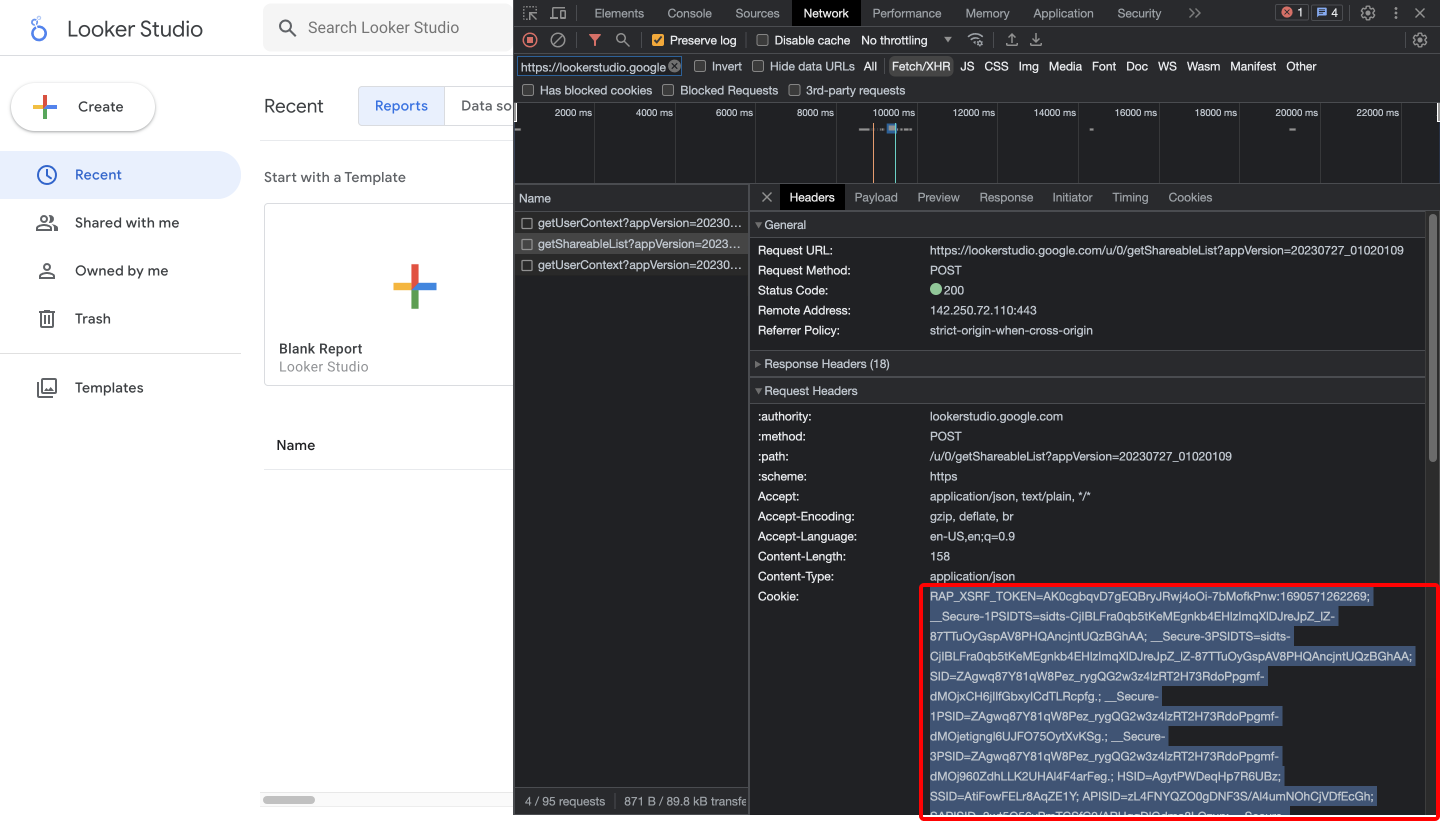
5. In the Headers tab, scroll down to the Request Headers section and copy the cookie header.

Connect to Looker Studio
After retrieving the session cookie, you can connect Looker Studio to Secoda by following these steps:
In Secoda, head to the Integrations page and click New integration
Select Looker Studio
Paste the cookie into the Cookie text input field and submit
Head to the Sync History tab on the side bar and click Run sync
Troubleshooting
Invalid authentication
Looker Studio uses session cookies for authentication, which often expire. In order to resolve this error, you’ll have to generate a new session cookie and add it to your Secoda workspace. The way to do this is outlined in the Looker Studio docs, found here.
Last updated
Was this helpful?