> For the complete documentation index, see [llms.txt](https://docs.secoda.co/llms.txt). Markdown versions of documentation pages are available by appending `.md` to page URLs; this page is available as [Markdown](https://docs.secoda.co/features/collections-1.md).
# Collections
Using Collections is a great way to organize your workspace. You can think of a Collection as a folder that hosts a group of resources (tables, columns, dashboards, dictionary terms, documents, questions) pertaining to one particular subject.
These folders can be organized however makes sense to your organization, but here's an example:
{% hint style="success" %}
**Example Collections for Customer Support Function**
Let's say you created a Team called "Customer Support" in order to organize resources relevant to that Team.
\
Next, you were hoping to organize the content into a few separate folders, so you create one Collection called "Customer Information" and another called "Customer Support OKRs".
In the Customer Information Collection you add the following resources:
* **Dictionary** metrics like daily active users and last login
* Data columns and tables from the **Catalog** like customer\_name, plan\_type, renewal\_date
* **Documents** explaining different processes while working with customers
In the Customer Support OKR Collection you add the following resources:
* **Dictionary** metrics like customer satisfaction, net promoter score, churn rate
* Dashboards from the **Catalog** showing customer health metrics
* **Documents** embedded with the Excel tracking sheet you use to report on OKRs
{% endhint %}
## Creating Collections
To create a Collection, navigate to the Collections page and click on "New Collection". After naming the Collection and creating it you can navigate to the Collection to add resources and update the metadata on a collection.
## Adding resources to Collections
There are a few ways that you can add a resource to a Collection:
#### Within the Collection
On the Collection page, you can add a resource to the Collection by clicking the "Add resource" button. After clicking the button, search for the resource you'd like to add and select the resource. The resource will be added to the Collection in the respective tab for the resource type.
#### From the Resource Page
On a resource page, you can add a resource to a Collection by opening up the right properties side bar, and clicking on the Collections selector.
#### Within the Catalog
From the Catalog, you can make bulk edits to your resource metadata ([Making bulk edits](/resource-and-metadata-management/add-documentation/bulk-editing-resources.md)). This includes adding many resources to Collections in just a few clicks. In the example below, the user filters for a specific schema in order to add all the columns from the schema into the same Collection, and then makes the bulk edits.
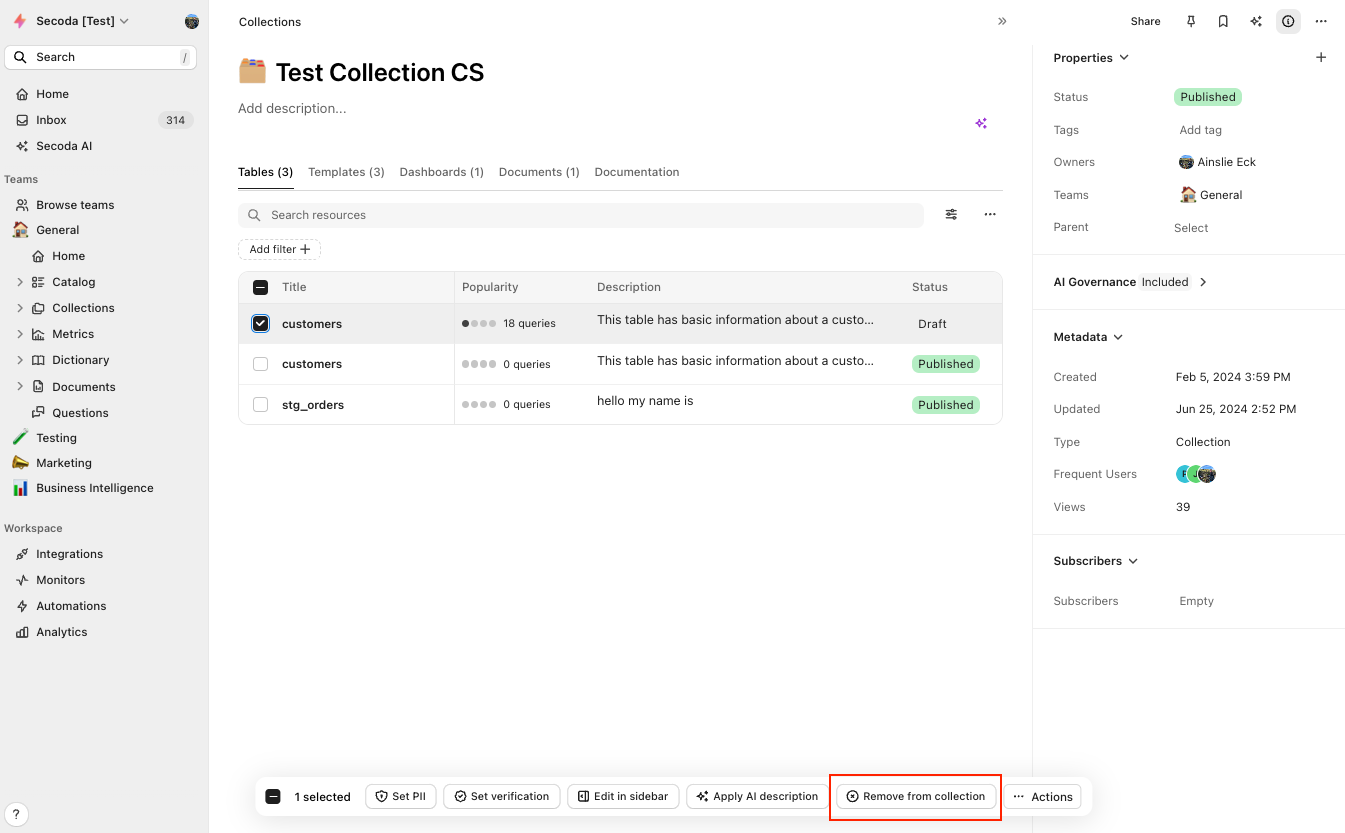
## Removing resources from Collections
To remove a resource from a Collection, simply check the box next to it and select "Remove from collection" from the Actions bar. You can also do this in bulk by checking off multiple resources.
## Nesting collections
You can nest a collection when first creating a collection or after a collection has been created. To nest a collection when it's being created, set the "Parent" collection in the creation modal.
%20\(1\).png)
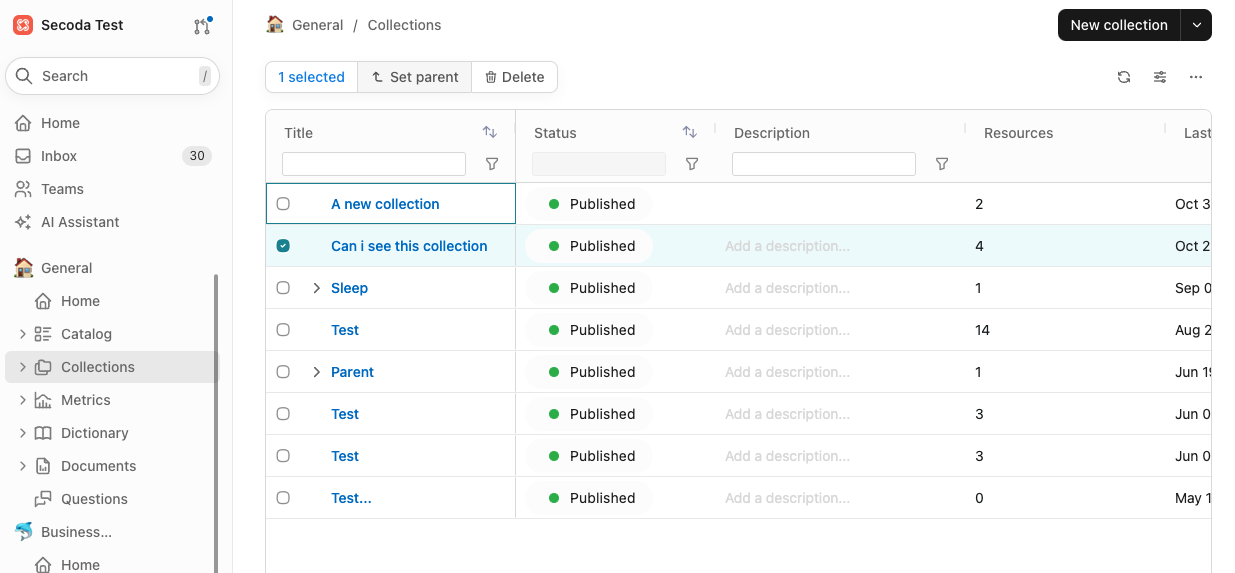
To add a nested collection after the collection(s) has been created, click into the list of collections and check off which you'd like to nest. Then click 'Set parent' and choose the collection that you'd like to be the parent.
Another way to do this is to navigate to a collection, click "Add resource" and then search for the collection you'd like to be nested inside the current selected collection.
%20\(1\)%20\(2\).png)
## **Other use cases for Collections:**
* Create Collections for specific sub-teams within a Team (Example: The "Data" Team could have separate Collections for "Business Intelligence" and "Data Science" sub-teams)
* In the General team, create a “Company” Collection for the entire company to see key metrics
* Create an “Investor” Collection for data shared with investors
* Create an “Onboarding” Collection to help new employees learn about the key data resources across the company
---
# Agent Instructions
This documentation is published with GitBook. GitBook is the documentation platform designed so that both humans and AI agents can read, navigate, and reason over technical content effectively. Learn more at gitbook.com.
## Querying This Documentation
If you need additional information that is not directly available in this page, you can query the documentation dynamically by asking a question.
Perform an HTTP GET request on the current page URL with the `ask` query parameter, and the optional `goal` query parameter:
```
GET https://docs.secoda.co/features/collections-1.md?ask=&goal=
```
`ask` is the immediate question: it should be specific, self-contained, and written in natural language.
`goal` is optional and describes the broader end goal you are ultimately trying to accomplish on behalf of the user. GitBook uses it to tailor the answer towards what is most useful for that goal.
The response will contain a direct answer to the question and relevant excerpts and sources from the documentation.
Use this mechanism when the answer is not explicitly present in the current page, you need clarification or additional context, or you want to retrieve related documentation sections.