Slack
Seamlessly integrate Secoda with your Slack workspace
Connecting your workspace to Slack allows you to receive notifications from Secoda regarding changes in your workspace and ask questions about your data directly from Slack. When using the Secoda extension for Slack you're agreeing to our Privacy policy and Terms of use.
You can learn more about all of the capabilities of this extension here: Slack user guide
Steps for setting up Slack
Create a new Slack channel, multiple channels depending on your use cases (ideas below), or decide which existing channel(s) you'd like to use. If you'd like to use a Private Slack channel for these, you must type
/invite @Secodain the channel and then go to Secoda and follow the below stepsAfter this channel is created or you've decided which existing channel you'd like to use, go to Extensions section in the Secoda Settings.
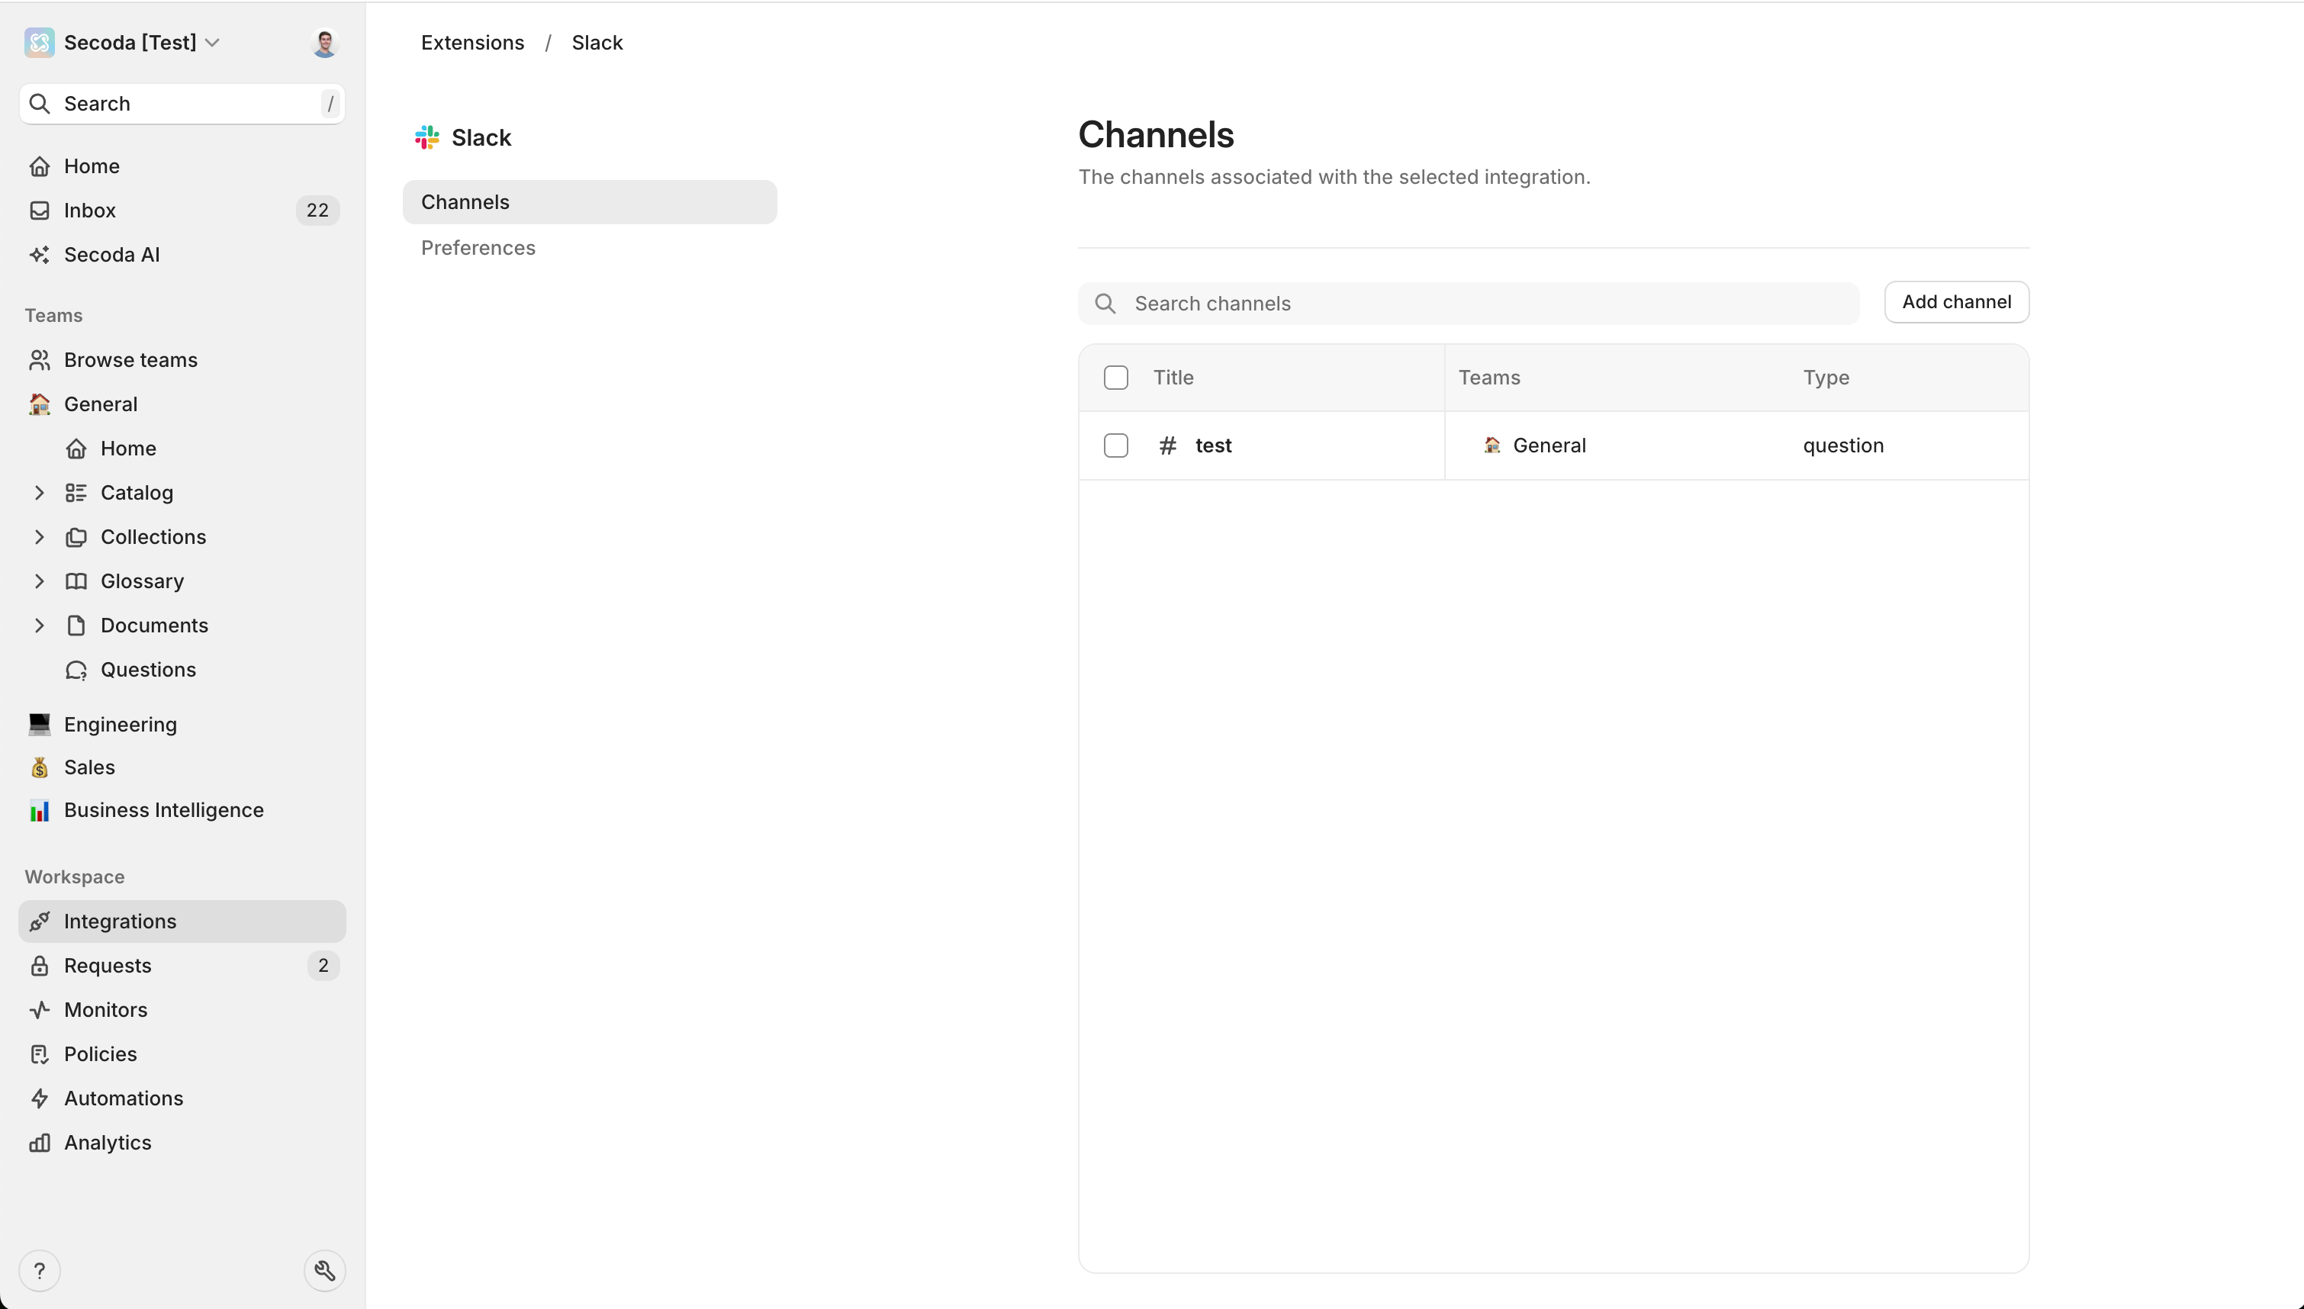
Click New extension and search for Slack.
Choose which Teams you'd like to include. We recommend choosing all so that everyone across your organization has access to the Secoda extension for Slack.
Click Connect. Note: This connection will need to be approved by your Slack admin manager.

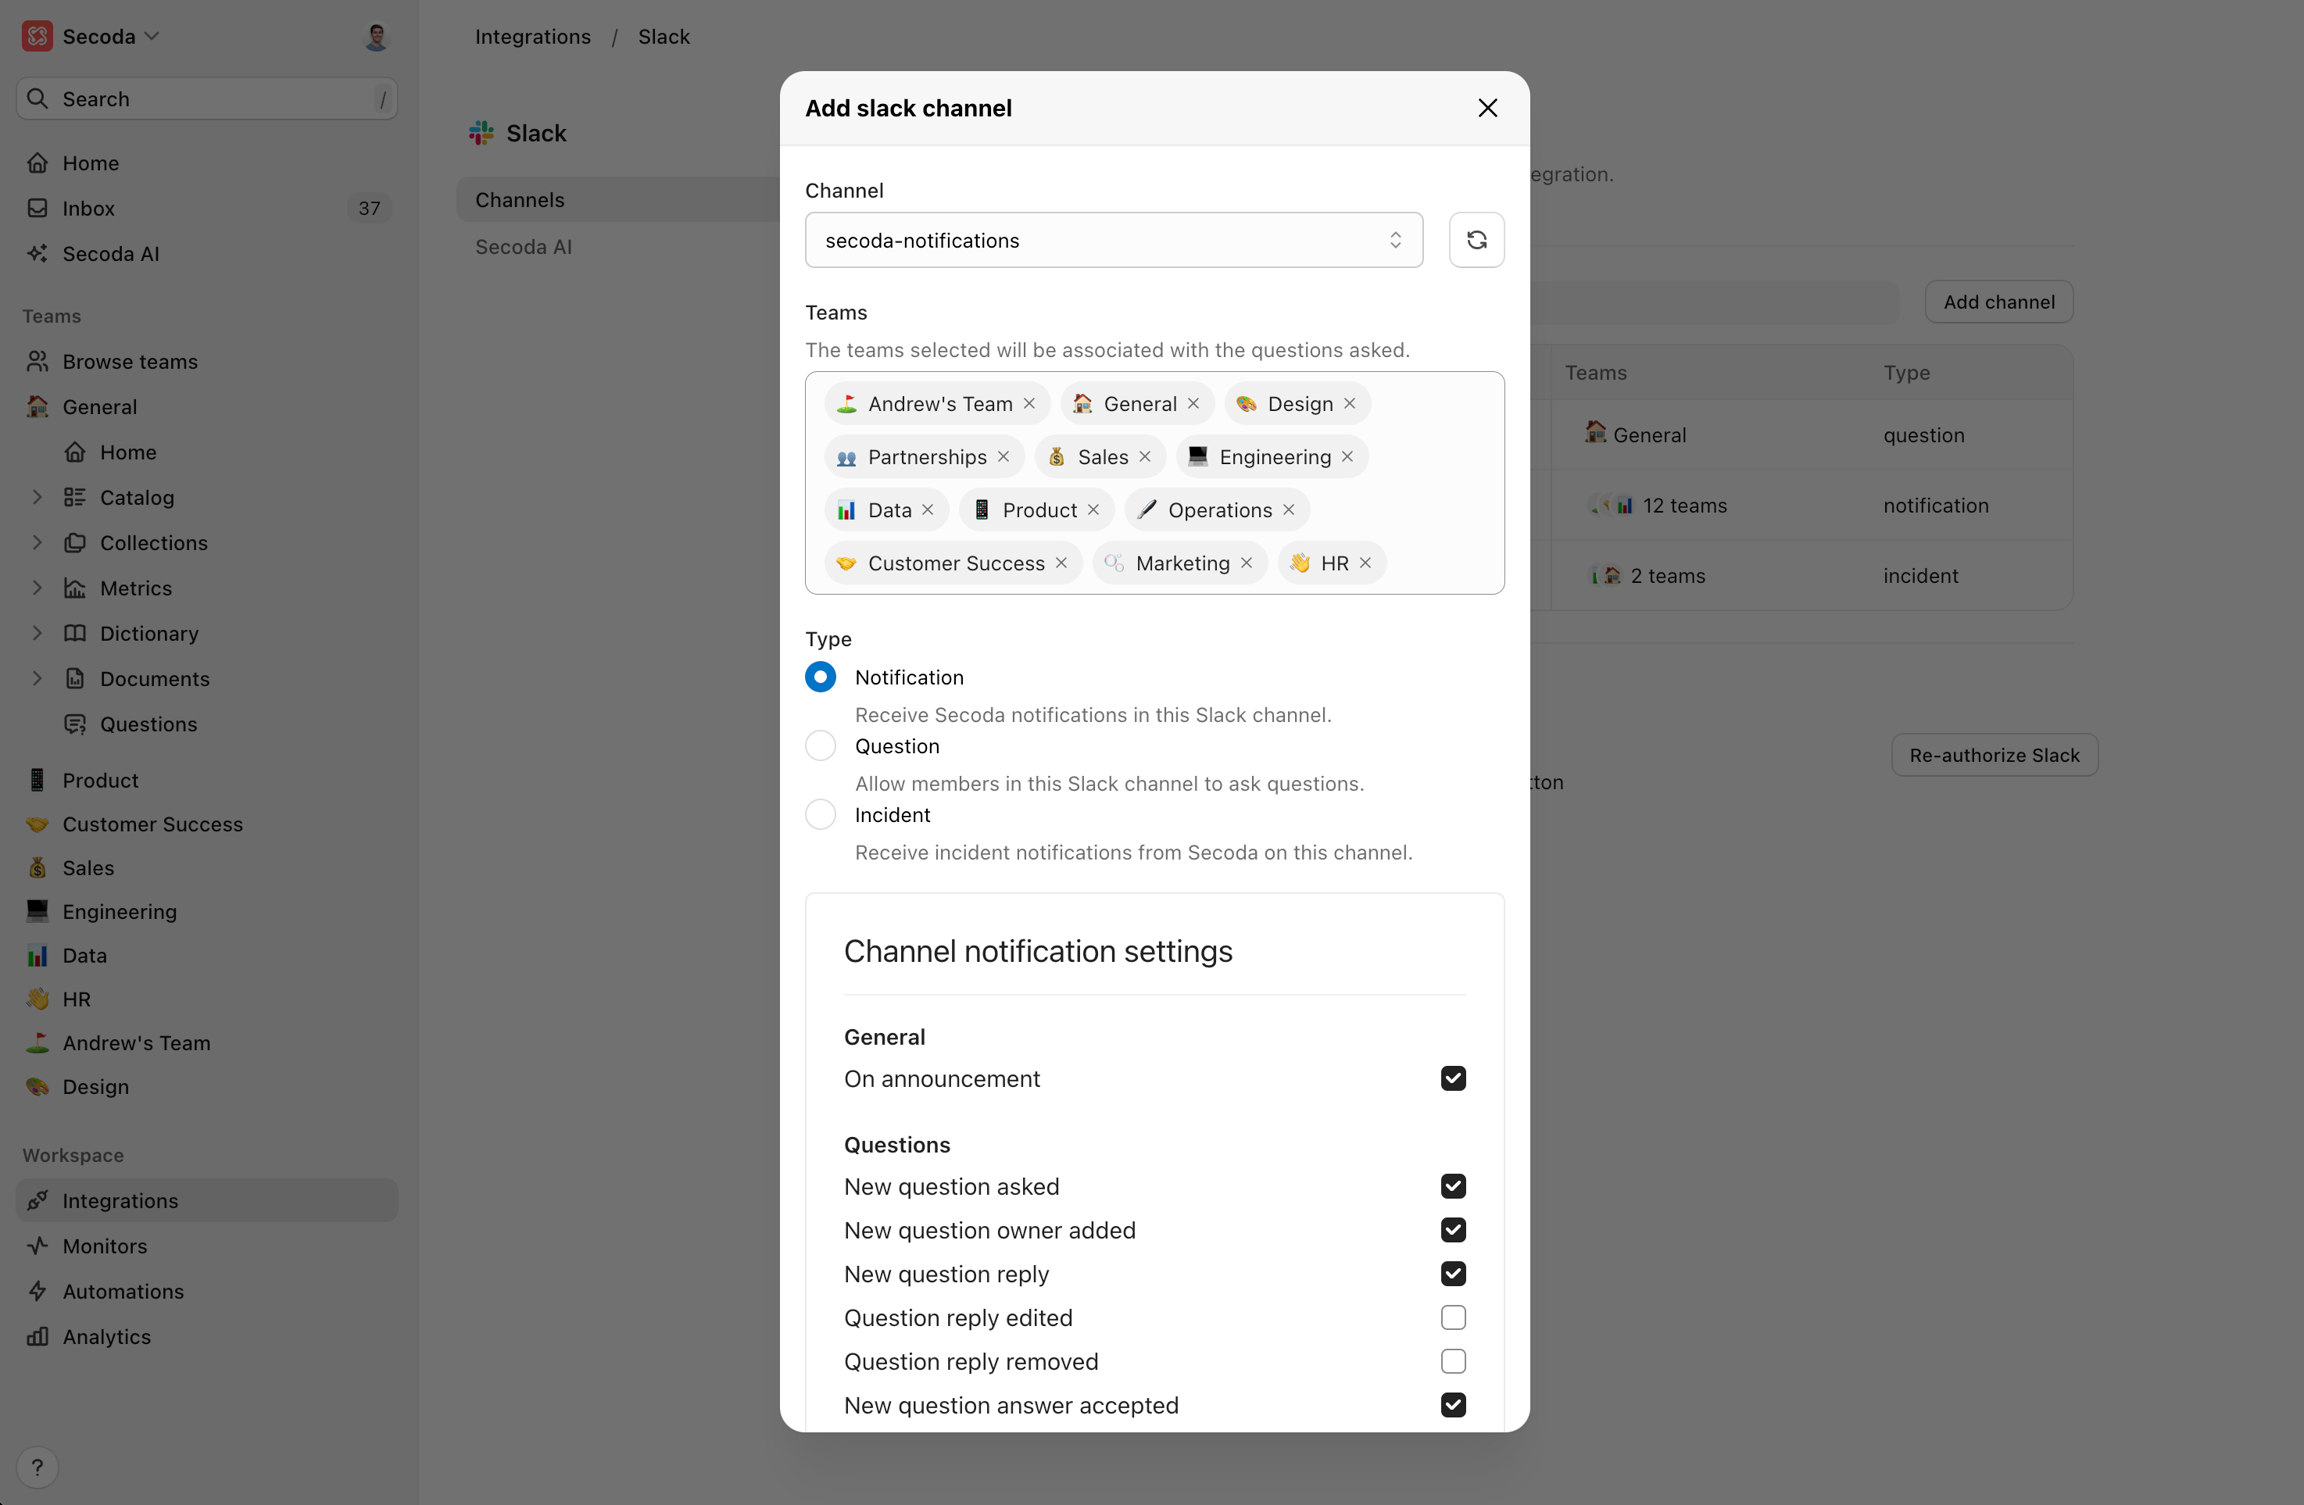
Notifications Channel = Where users receive notifications on everything that is checked off in the Notifications tab of the extension settings
Incidents Channel = Where users receive notifications on new monitoring incidents, and when they resolve
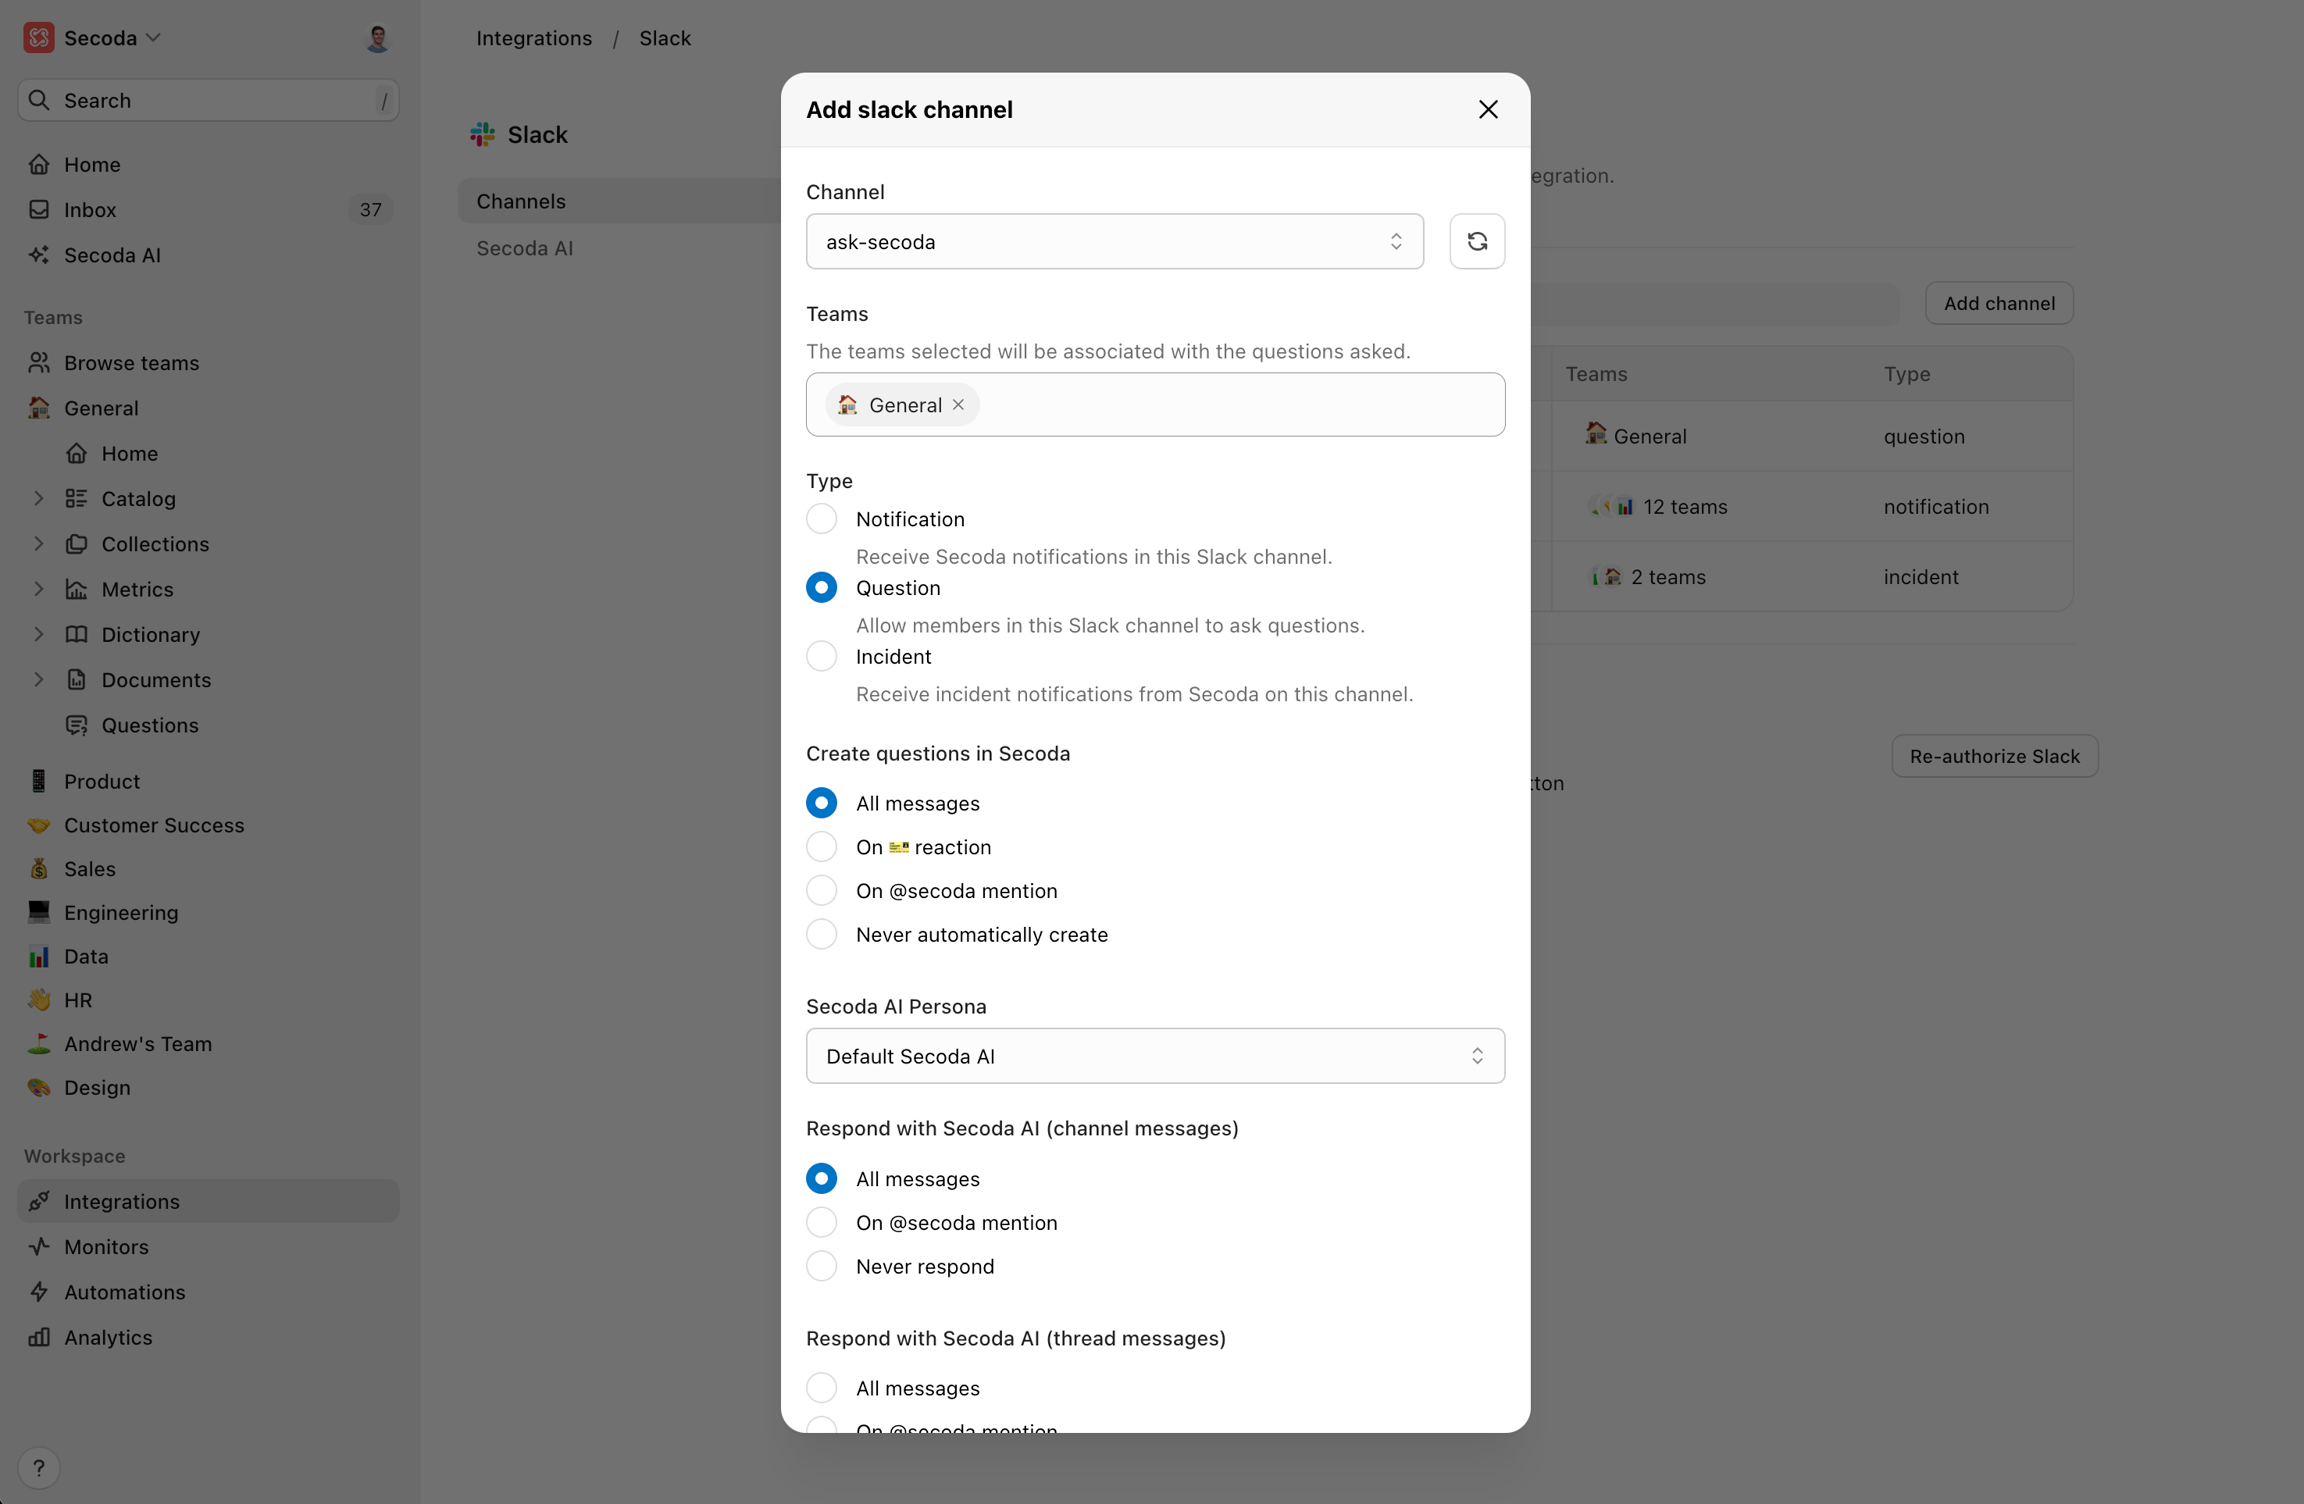
Questions Channel = Where users can ask data questions and receive Secoda AI-generated responses\
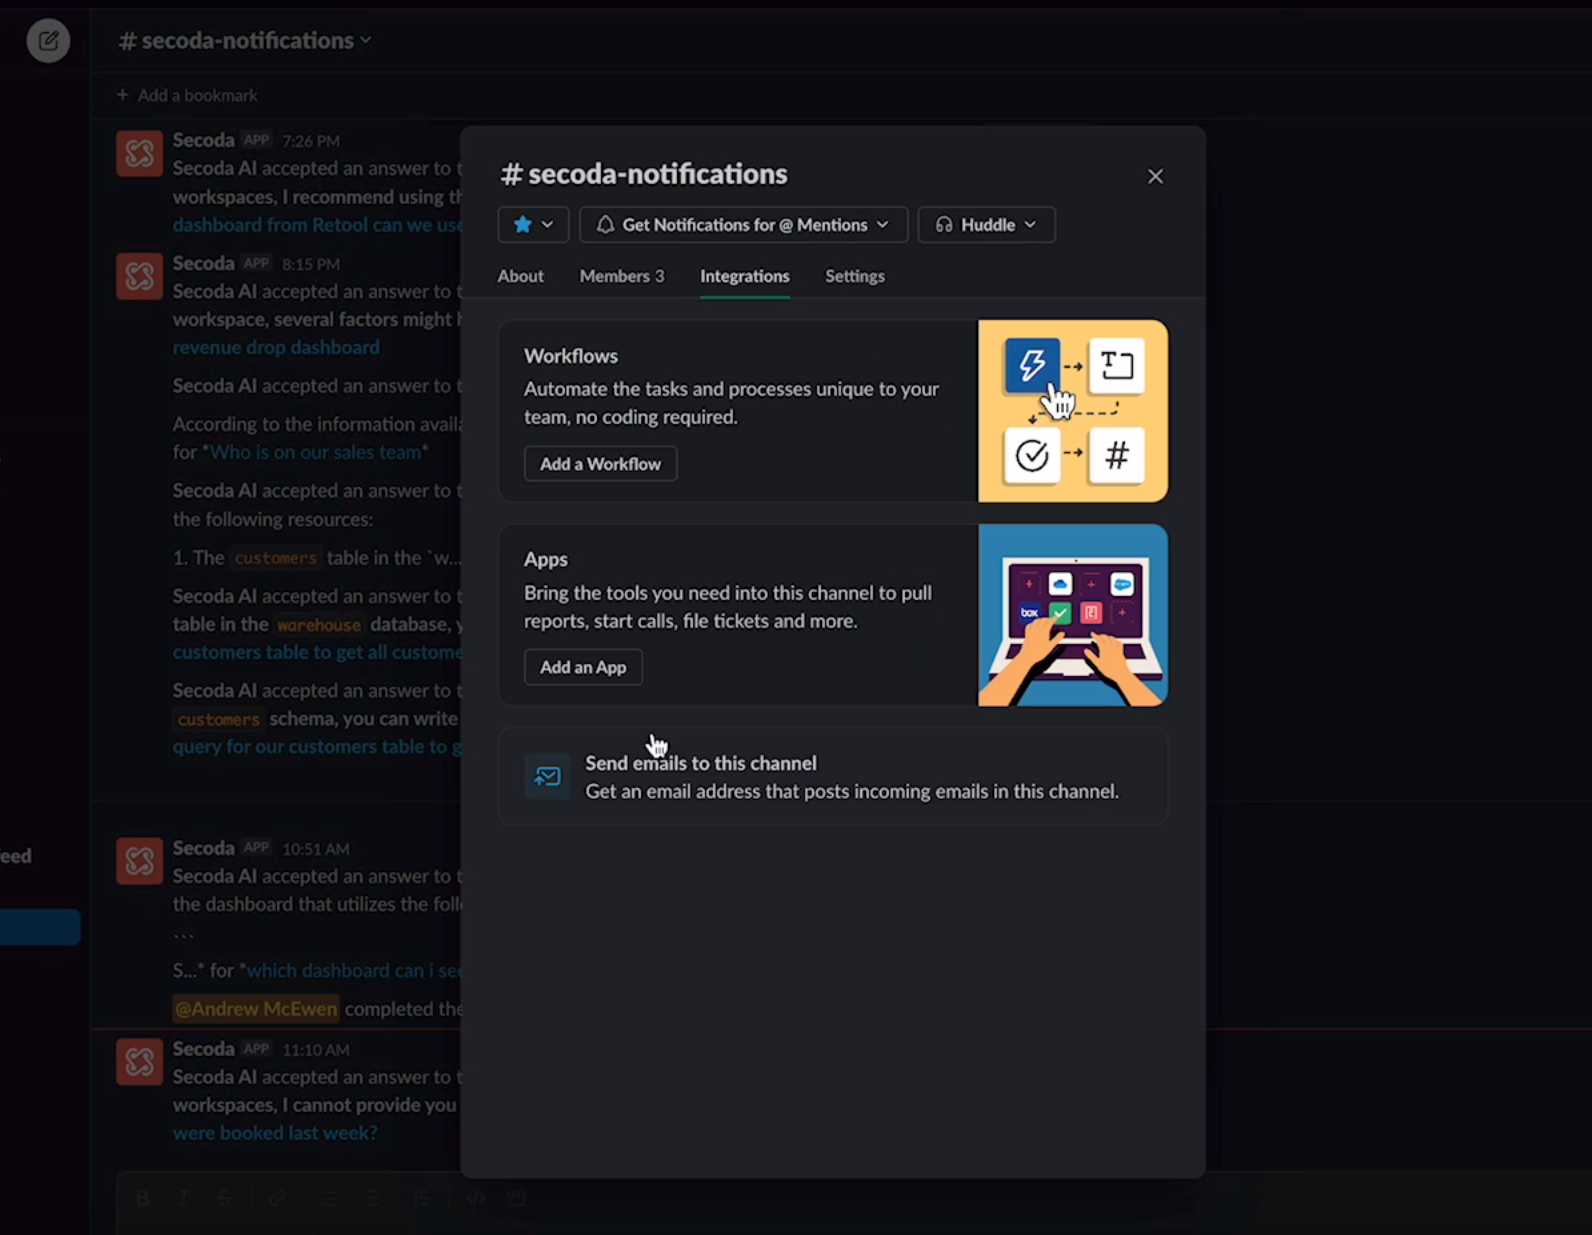
Within the Slack app, go into the Slack channel(s) you chose and connect it to the Secoda App. This can be done in the channel settings (upper right hand corner) by clicking Integrations > Add an App.
Note: A Slack Admin needs to do this step.

Configuring Channels
The Secoda Slack extension allows you to streamline communication with your data team and manage incidents directly from Slack. To make the most of this extension, you can configure dedicated Slack channels for different types of interactions. Here’s how to set up each type of channel.
Questions Channel
The “Questions” channel is where data consumers can ask questions and interact directly with the data team. This channel supports bi-directional syncing with Secoda, meaning any questions asked in Slack will be automatically logged in Secoda, and responses from the data team will sync back into the Slack conversation.
• Setup: Create or select a channel for questions, such as #data-questions. Ensure Secoda is added to the channel to enable bi-directional syncing. Configure the behaviour for pushing threads to Secoda questions and how Secoda AI responds to the questions.
• Use case: Great for quick inquiries about data definitions, metrics, or troubleshooting issues.

Notifications Channel
The “Notifications” channel is used to receive automated updates from Secoda, such as new data releases, system updates, or important announcements.
• Setup: Create or select a channel for notifications, such as #secoda-notifications. Configure the notification preferences in Secoda to send updates to this channel.
• Use case: Ideal for keeping your data team and other stakeholders informed about any changes or important updates in your data ecosystem.\

Incidents Channel
The “Incidents” channel is dedicated to managing monitoring incidents. Like the Questions channel, it supports bi-directional syncing. This allows incident discussions initiated in Slack to be automatically tracked in Secoda, while any updates made in Secoda regarding an incident will sync back to the Slack conversation.
• Setup: Create or select a channel for incident management, such as #data-incidents. Add Secoda to the channel to enable bi-directional syncing for incidents.
• Use case: Critical for managing data or system outages and ensuring that both the incident and its resolution are well-documented and tracked in real-time.\
By setting up these channels, your team can stay in sync with data operations and ensure effective communication between data consumers, the data team, and incident management processes.
How it works
There are many ways to use the Secoda extension for Slack. The following three scenarios can be managed in one Slack channel, or can be split into multiple different channels:
Receiving workspace-level notifications in a chosen Channel: These can be helpful for the workspace Admins to all be notified of workspace-level changes. Admins/Editors can also send Announcements to this Slack channel. Configure these in the Notifications tab in the extension Settings.
Receiving Monitoring incident alerts: Get alerted about new incidents and when they've resolved to monitor data quality.
Managing data-related questions: Set up a workflow in Slack for managing user questions about data.
You can also use the Secoda extension for Slack for personal direct message notifications, and searching Secoda privately.
Receive personally relevant notifications via DM: After configuring your preferences in Settings and adding the Slack app, you can get personal notifications via DM.
Searching and asking questions privately: Use the Slack command
/secodaanywhere in Slack to search Secoda in a private way.
Benefits to Connecting Secoda to Slack
Stay updated: By connecting Slack to Secoda, you can receive notifications about changes to your data or data documentation directly in Slack. This allows you to stay up-to-date and informed about what's happening with your data, without having to constantly check Secoda or other data management tools.
Collaboration: Connecting Slack to Secoda allows users to ask and answer questions about your data directly from Slack. This can facilitate collaboration and help ensure that everyone has access to the information they need to make informed decisions.
Convenience: By integrating Slack and Secoda, you can access data-related information and communicate with team members directly from the Slack platform. This can save time and reduce the need to switch between different tools and applications.
Improved productivity: By streamlining communication and access to data-related information, connecting Slack to Secoda can help improve productivity and reduce the risk of errors or misunderstandings.
Overall, connecting Slack to Secoda can help your team stay updated, collaborate more effectively, and work more efficiently.
Troubleshooting
If you encounter issues with the Slack extension, don't hesitate to reach out to our support team at [email protected] for assistance.
Not using Secoda to manage your data knowledge yet? Sign up for free here 👈
Last updated
Was this helpful?