

Okta SAML
Steps:
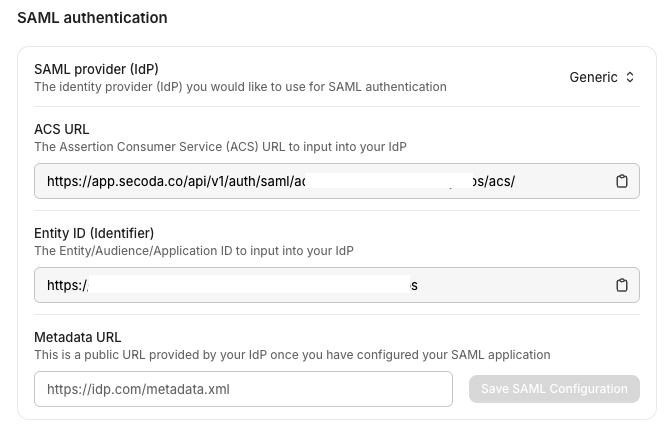
Go to the Secoda app > Settings > Security > SAML. Copy the ACS URL and Entity ID for use in the following steps.
Secoda app > Settings > Security > SAML In the Okta console: click the button “Create App Integration” (SAML2.0)
Name the app
SecodaSet the SSO URL and Audience to your personalized ACS URL copied from above.
Add the following attribute statements. While Okta marks them as optional, this step is required.
Click Next.
Click Finish. Assign users to this application if you want them to be able to sign in.
Go to the Sign On tab and expand the SAML 2.0 box to see the Metadata details. Copy the Metadata URL
Navigate to the Secoda app > Settings > Security > SAML
Choose Okta as the SAML Provider (IdP)
Paste the link from Step 8 under Metadata URL. Save this configuration.
Now you can logout, click “Sign in with SAML”, and enter your domain to complete sign-in.
Last updated
Was this helpful?