OneLogin SAML
Steps
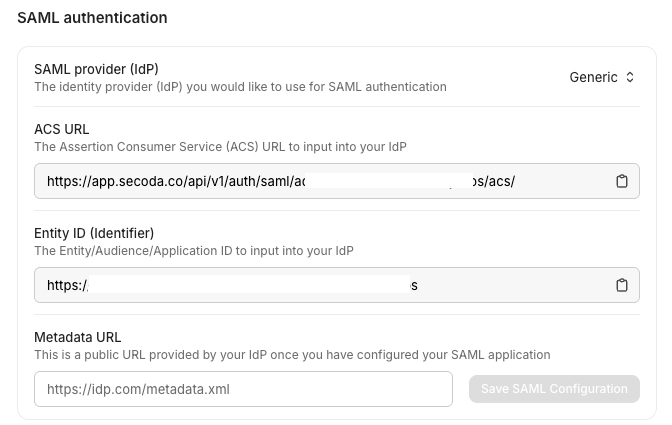
Go to the Secoda app > Settings > Security > SAML. Copy the ACS URL and Entity ID for use in the following steps.

Secoda app > Settings > Security > SAML In the OneLogin console go to Applications > Add App and search for "SAML Custom Connector (Advanced)" and select the option.
Name the app
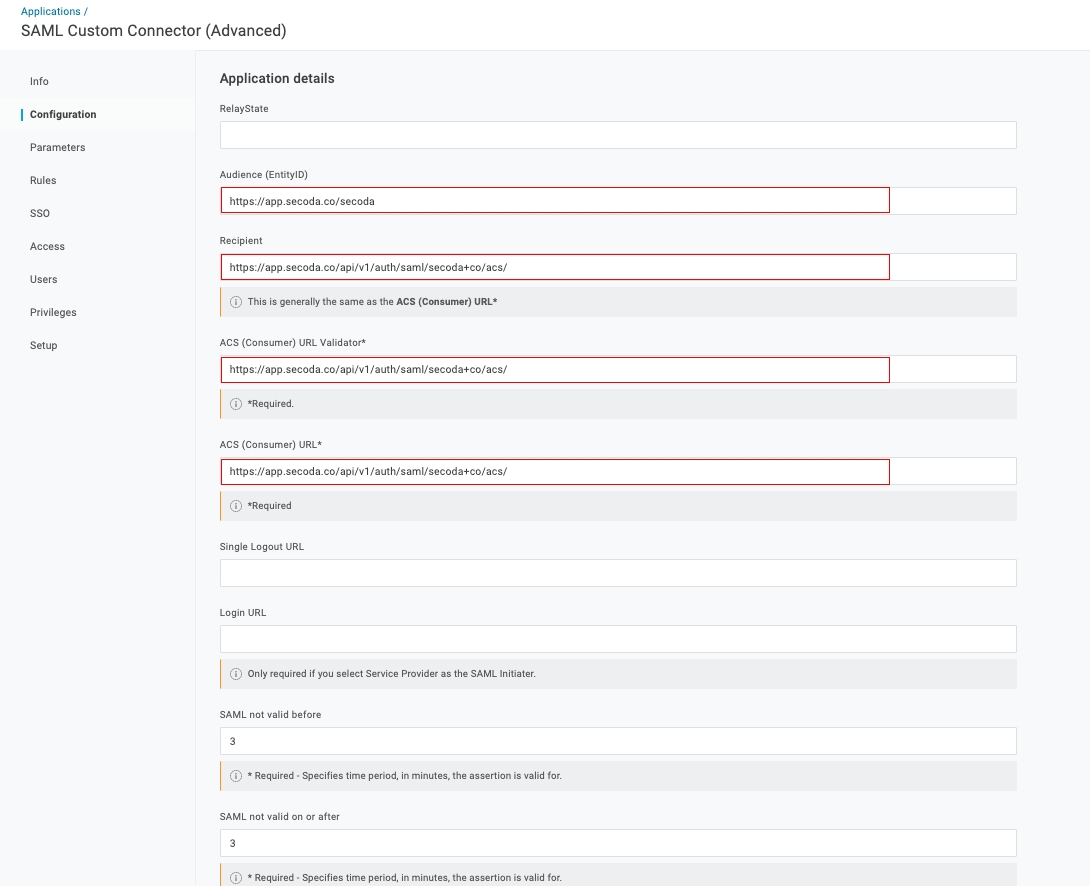
Secodaand click Save.In the Configuration tab set the Audience to the Entity ID (Identifier) from Step 1. Set the Recipient, and ACS (Consumer) paths to the ACS URL from Step 1.

Go to the Parameters tab and add a new parameter by clicking the + button. Add the
email, `firstName, andlastNameparameters.


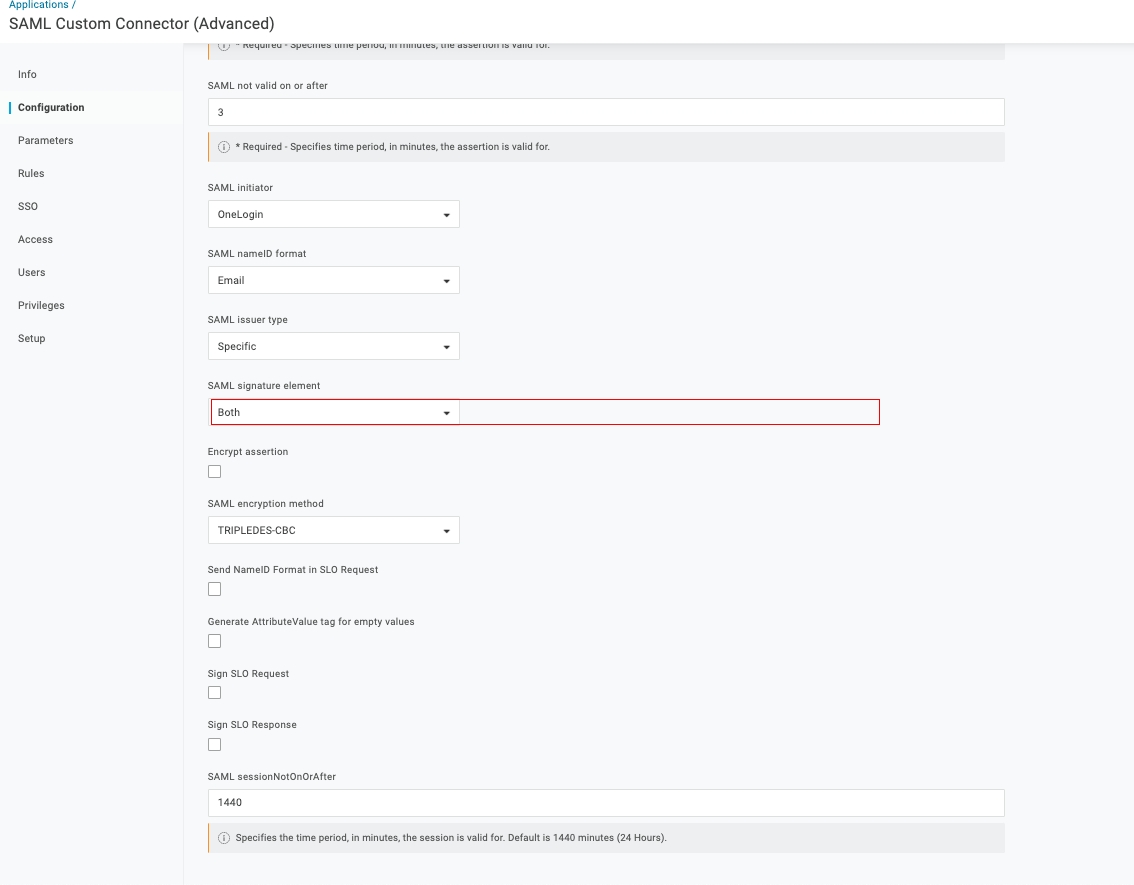
Check Both for the SAML signature element field.

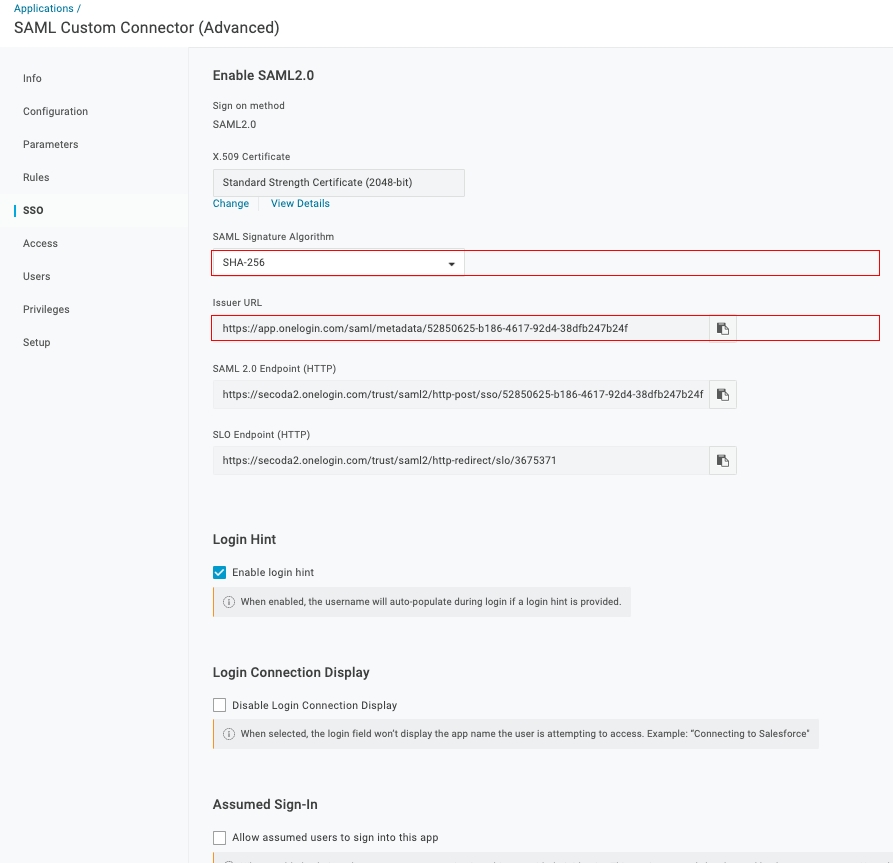
Change the SAML Signature Algorithm to SHA-256. Then save all of your changes. Copy the Issuer URL and submit that at Secoda app > Settings > Security > SAML as the Metadata URL with IdP Provider set to Generic. Save this configuration.

You will now be able to go to navigate to Secoda, click “Sign in with SAML”, and enter your domain to complete sign-in.
Last updated
Was this helpful?